DOWNLOAD THE MANUAL
Watch the videos
Detailed Instructions, Tips & Tricks
PROFESSIONAL FEATURES:
-
HARDENED ALLOY STEEL CONSTRUCTION
-
GRADE-8 BOLTS
-
EXTENDED 1-1/2” FEMALE RAM THREAD
-
3-YEAR WARRANTY
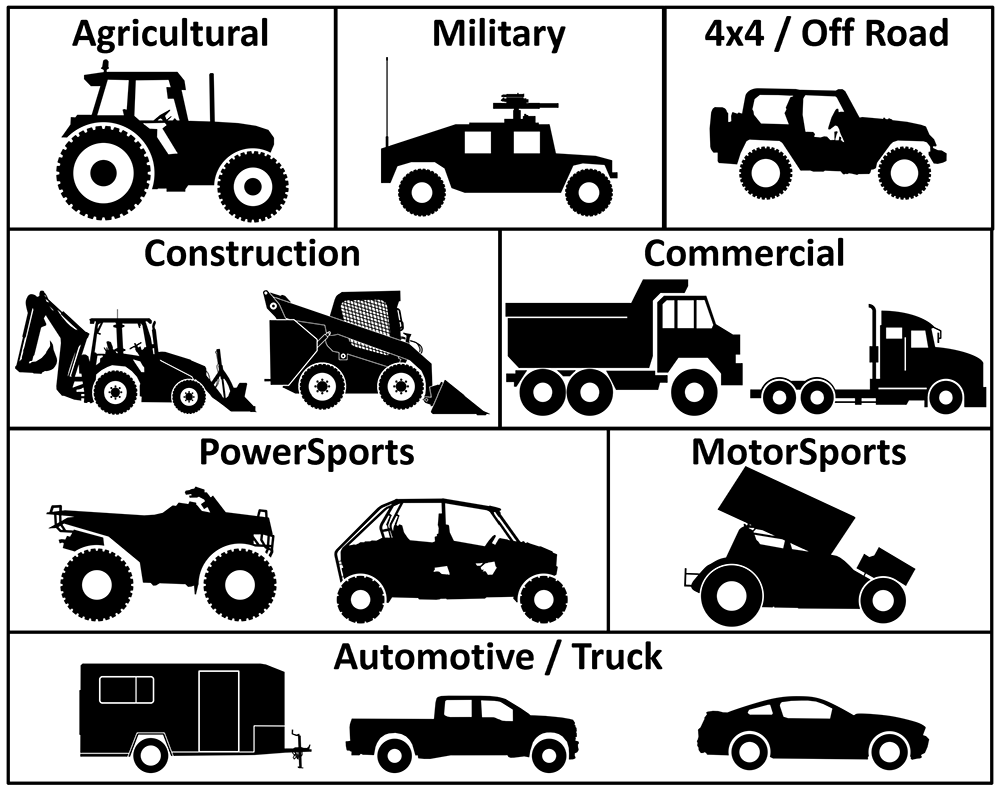
The BeadBuster XB-550i HD was designed to work on ANY Large 1-Piece Wheel, including:
(9″+ ATV/UTV Wheels only)
4 Configurations for Use on Small and Large Rims
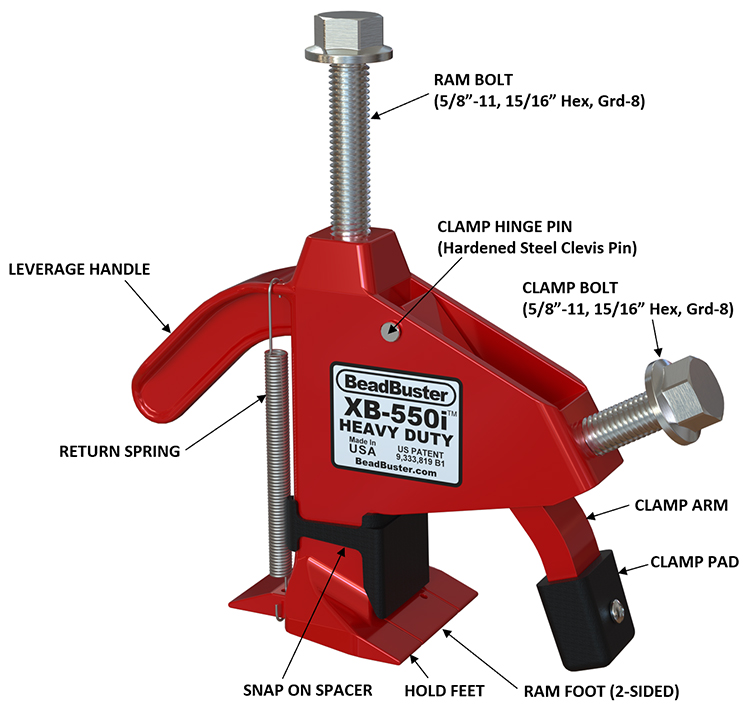
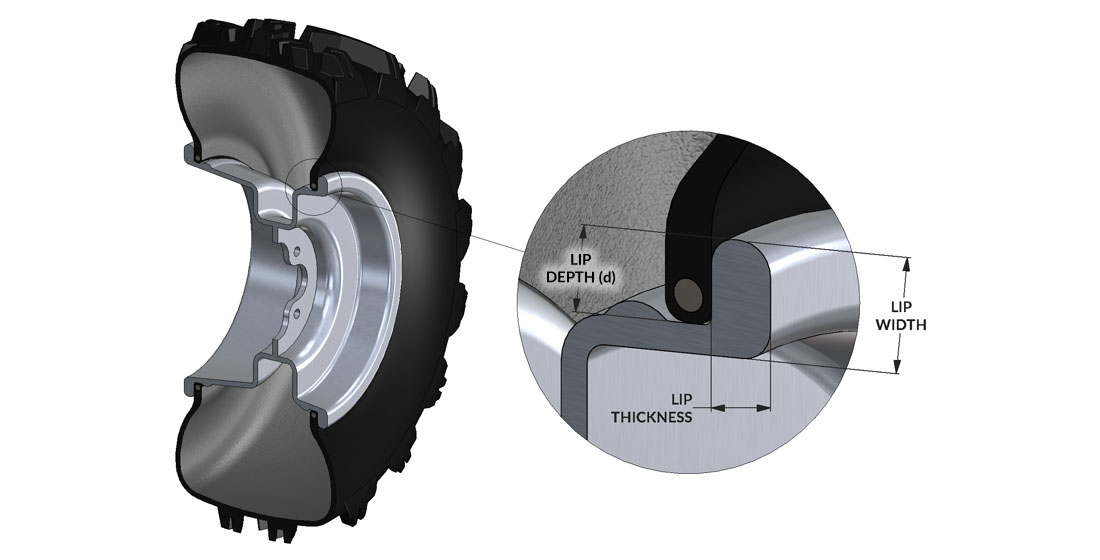
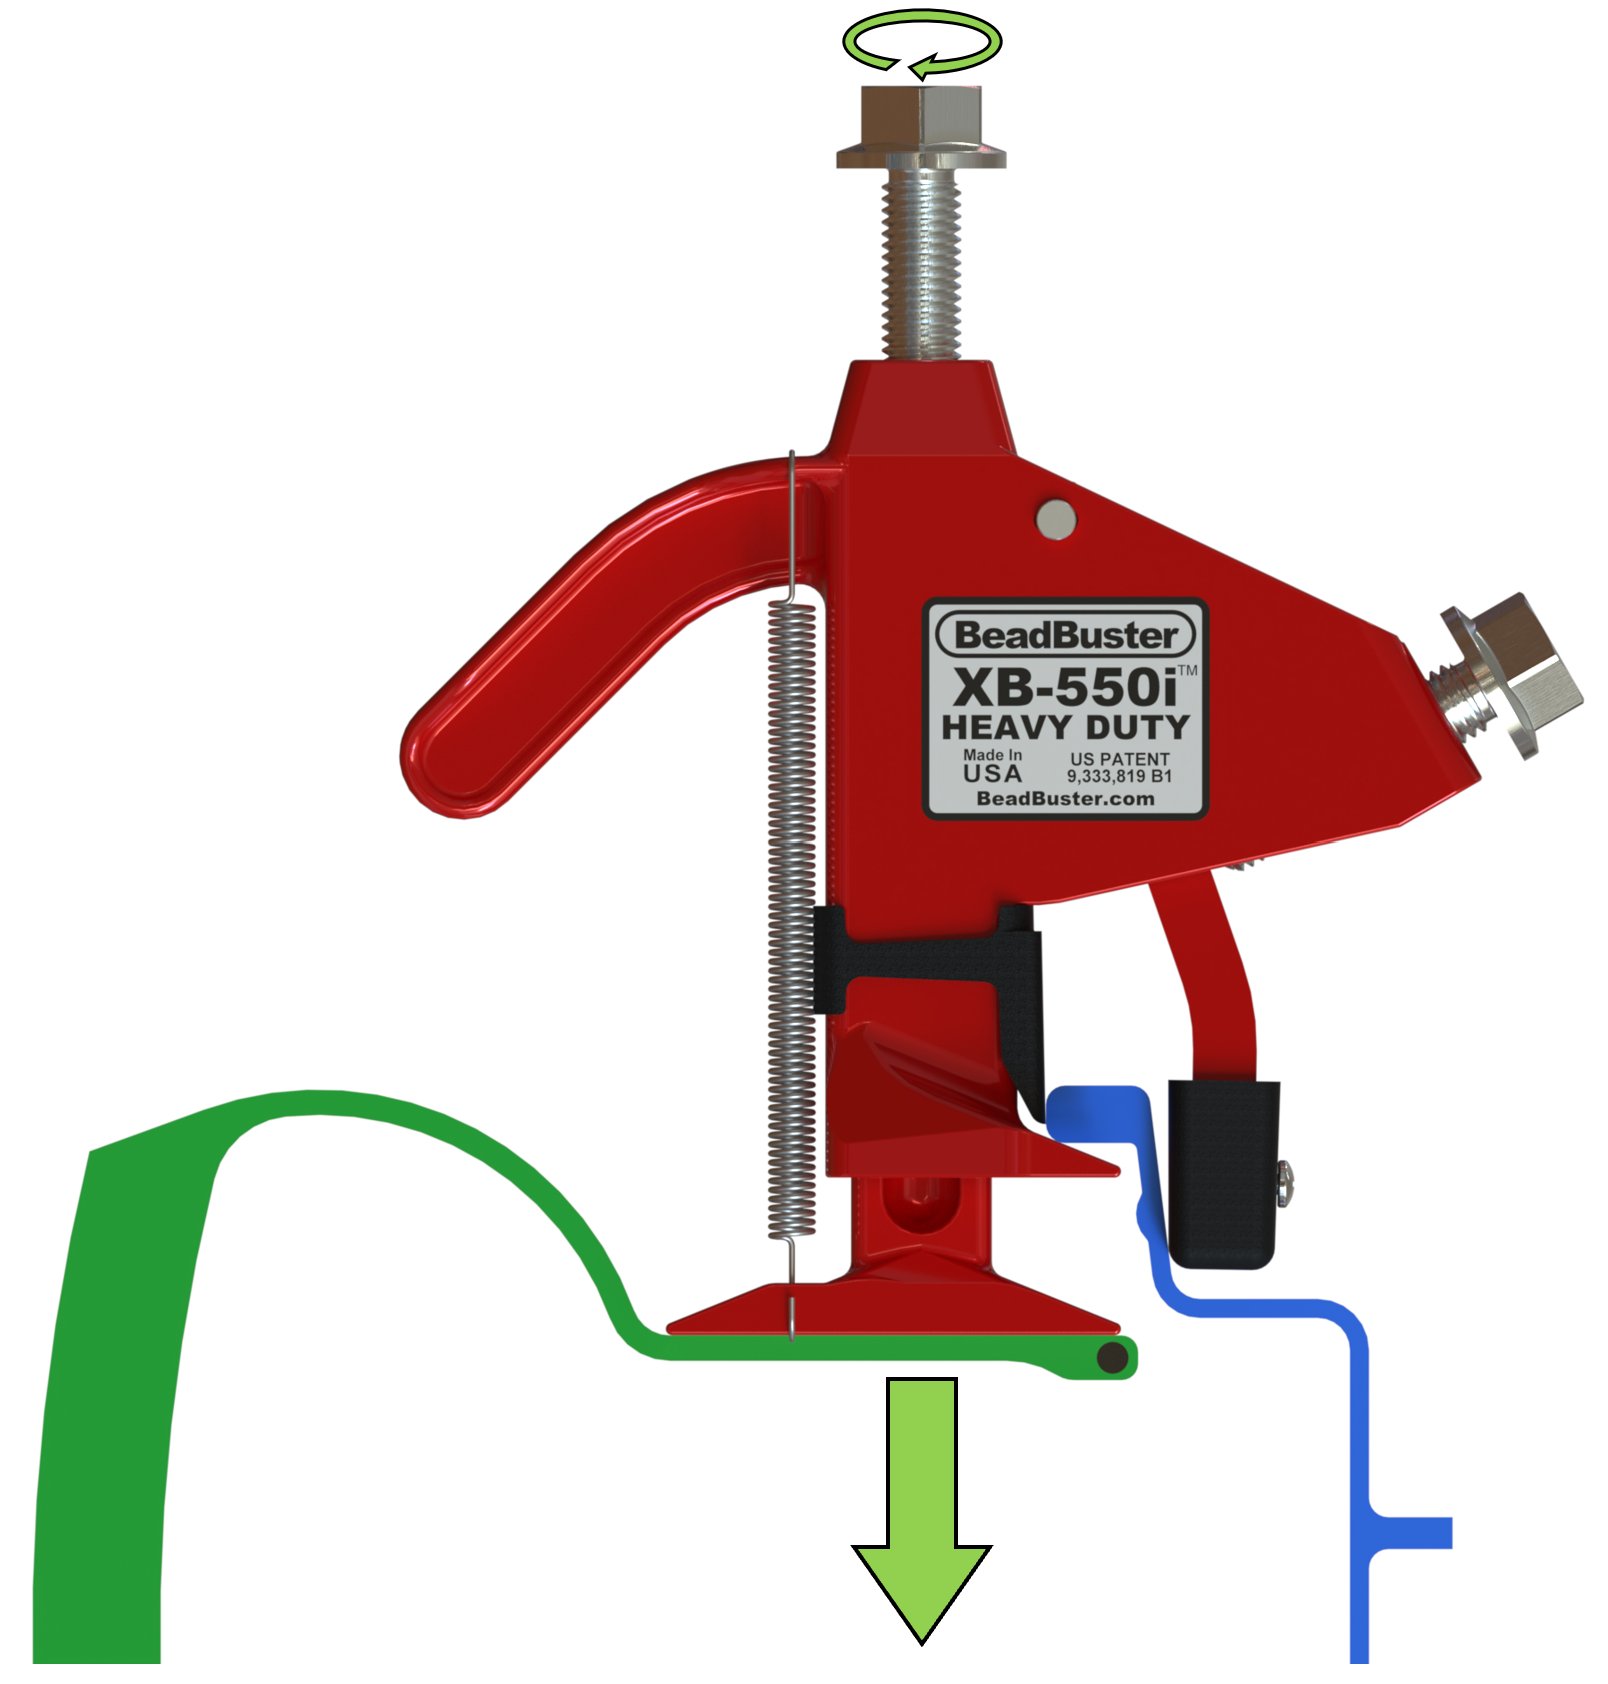
The BeadBuster XB-550i HD is equipped with a 2-Sided Ram Foot, and a plastic snap-on Spacer that, when combined, will accommodate a wide range of wheel sizes. Different wheel types (ATV’s vs. Agricultural vs. Industrial, vs. OTR, etc) all have different rim lip sizes, and most critically is the Rim Lip Depth (d).
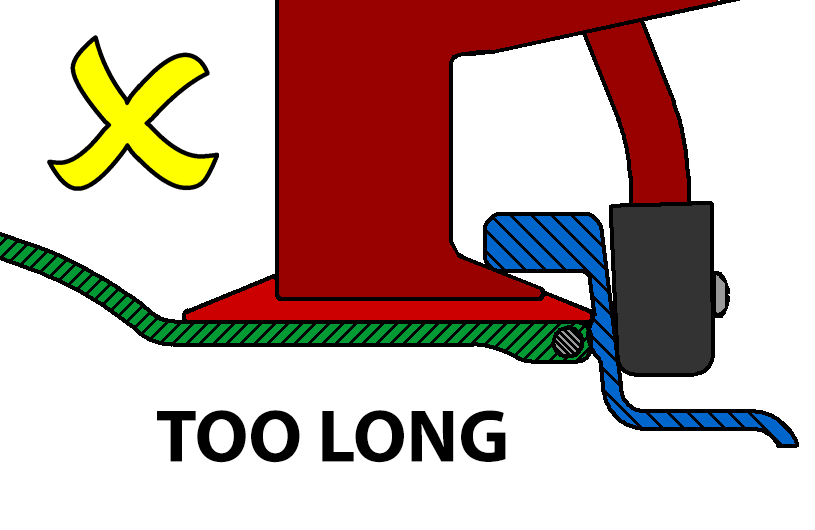
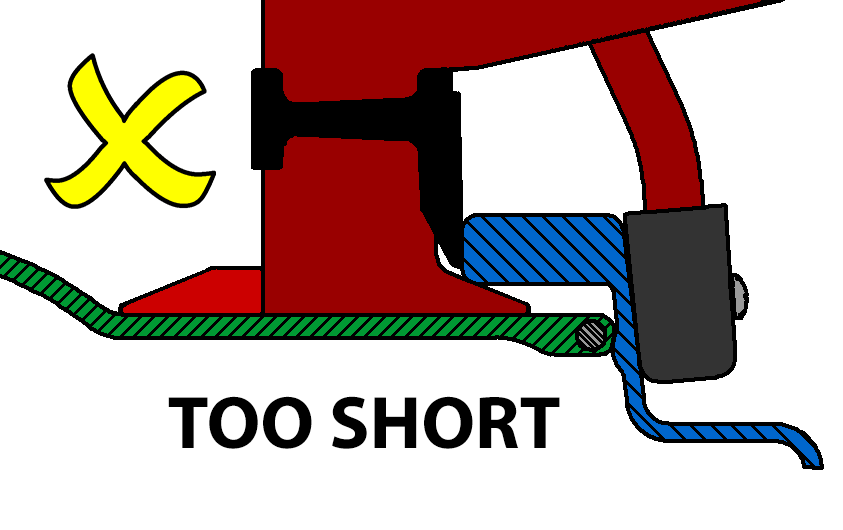
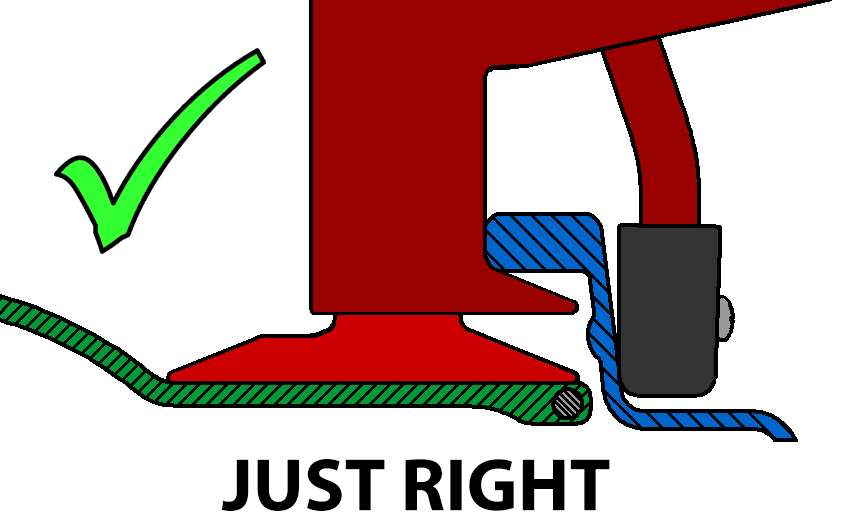
The function of the BeadBuster relies on the Ram Foot extending as far as possible underneath the lip of the rim so that it covers the steel cord (Bead Bundle), but does not go so far that it will engage the Bead Retainer when the Ram Foot pushes down.
The 4 different combinations of Ram Foot side and Spacer will work with a large range of Rim Lip Depths.
The XB-550i HD will work on:
Lip Depths (d): 0.585″ – 1.500″
Lip Thickness: < 1.75″
Lip Width: < 2.70″ (the overall rim lip width on the outside needs to be smaller than this figure)
The majority of smaller wheel applications (such as cars, trucks and ATV’s) require the SHORT FOOT w/ SPACER.
Large wheel applications such as Agricultural, Industrial and OTR have larger rim lips and may require one of the other tool configurations. The goal is to choose a foot length that gets close to the Bead Seat of the rim without touching it, so that it has clearance with the Bead Retainer. Using too short of a foot may miss the Bead Bundle all together and could puncture the sidewall.
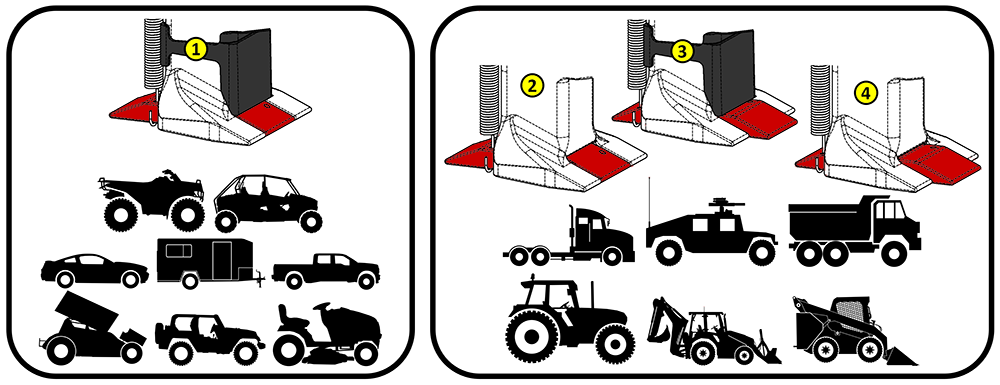
You can check our HELP ME CHOOSE page to see if the XB-550i HD is compatible with your tractor tires, or other heavy equipment wheels. If you don’t know your vehicle’s rim code, you can measure your rim and compare it to the XB-550i spec’s.

The critical dimensions are the Rim Lip THICKNESS, DEPTH. and WIDTH. The lip thickness and width can be measured with the tire still on the rim, but to estimate the lip depth, you need to subtract inside diameter of your new tire from the outermost diameter of the rim.
Rim Lip Depth (d) = (Outermost Rim Dia. – Inside Tire Dia.) / 2
eg:
New Tire Inside Dia. = 46″
Outermost Rim Dia. = 48.26″
Lip Depth (d) = (48.26 – 46) / 2 = 2.26/2 = 1.13″
Instructions for Using the XB-550i HD
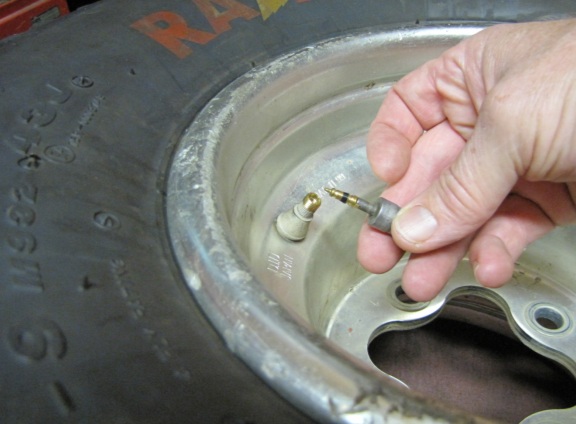
1. Remove the valve core to completely release air pressure from tire.
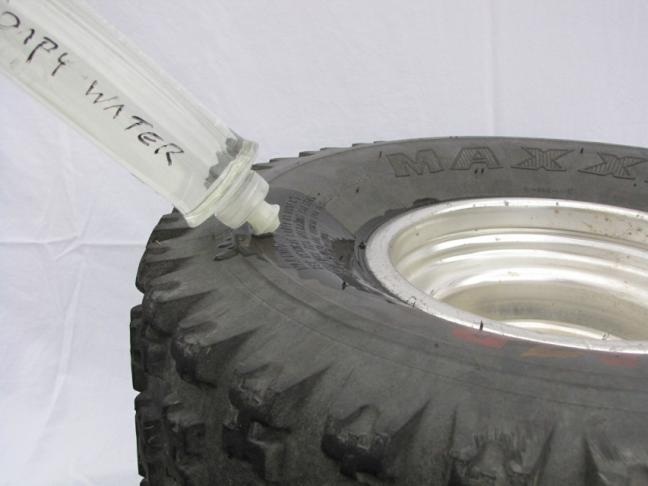
2. Start with the ‘shallow’ side nearest the drop center…this is usually the outside face of the wheel. Apply BeadBuster Tire Mount Lube (or other lubricant, like soapy water) to the bead. Push down on the sidewall to ensure that soapy water flows in between the rim and tire. Changing tires is essentially a battle against friction. Tire mount lube reduces the friction and makes the job much easier.
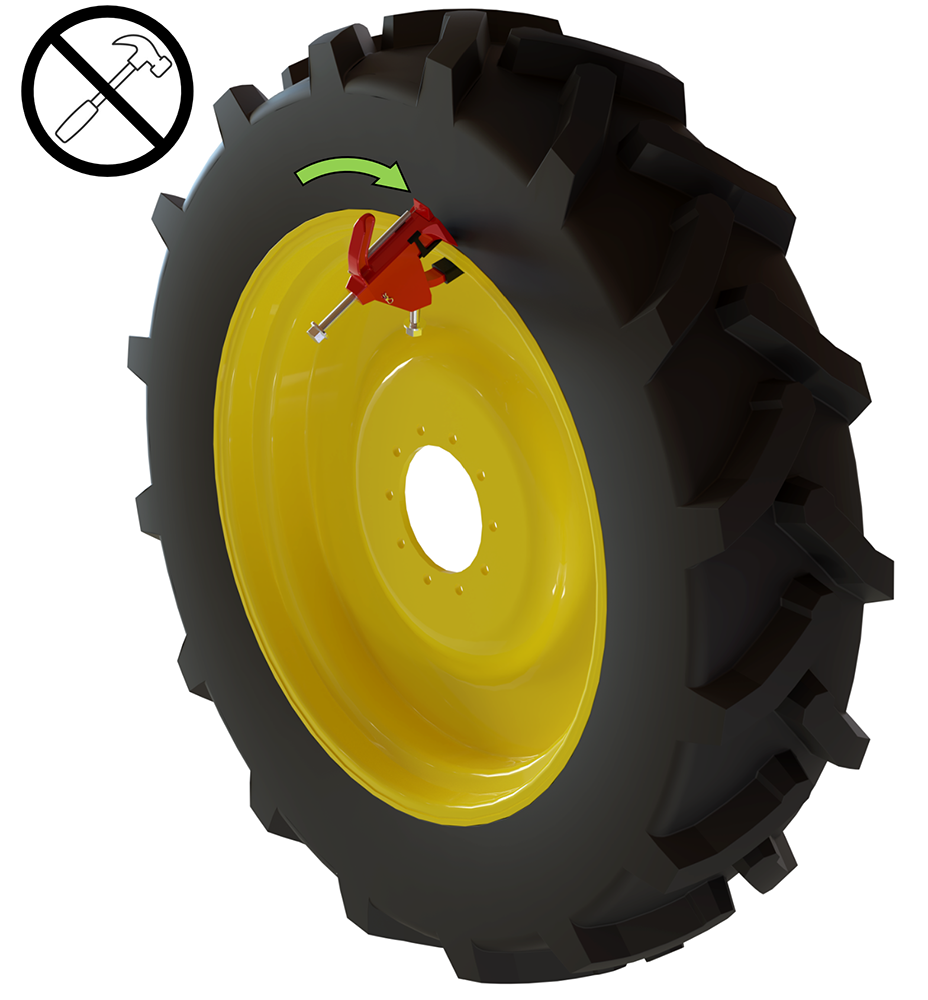
3. Press the feet of BeadBuster XB-550i HD in between the lip of the rim and the tire bead. Use the handle of the BeadBuster to aid in getting the feet positioned and applying downforce on the tire sidewall. The tire mount lube helps it slide in. Pressing the feet down onto the sidewall 1st helps create a small gap for the feet to enter. Make sure the feet are started in the tire-rim gap before advancing the clamp bolt. DO NOT USE a hammer to force the tool into place.
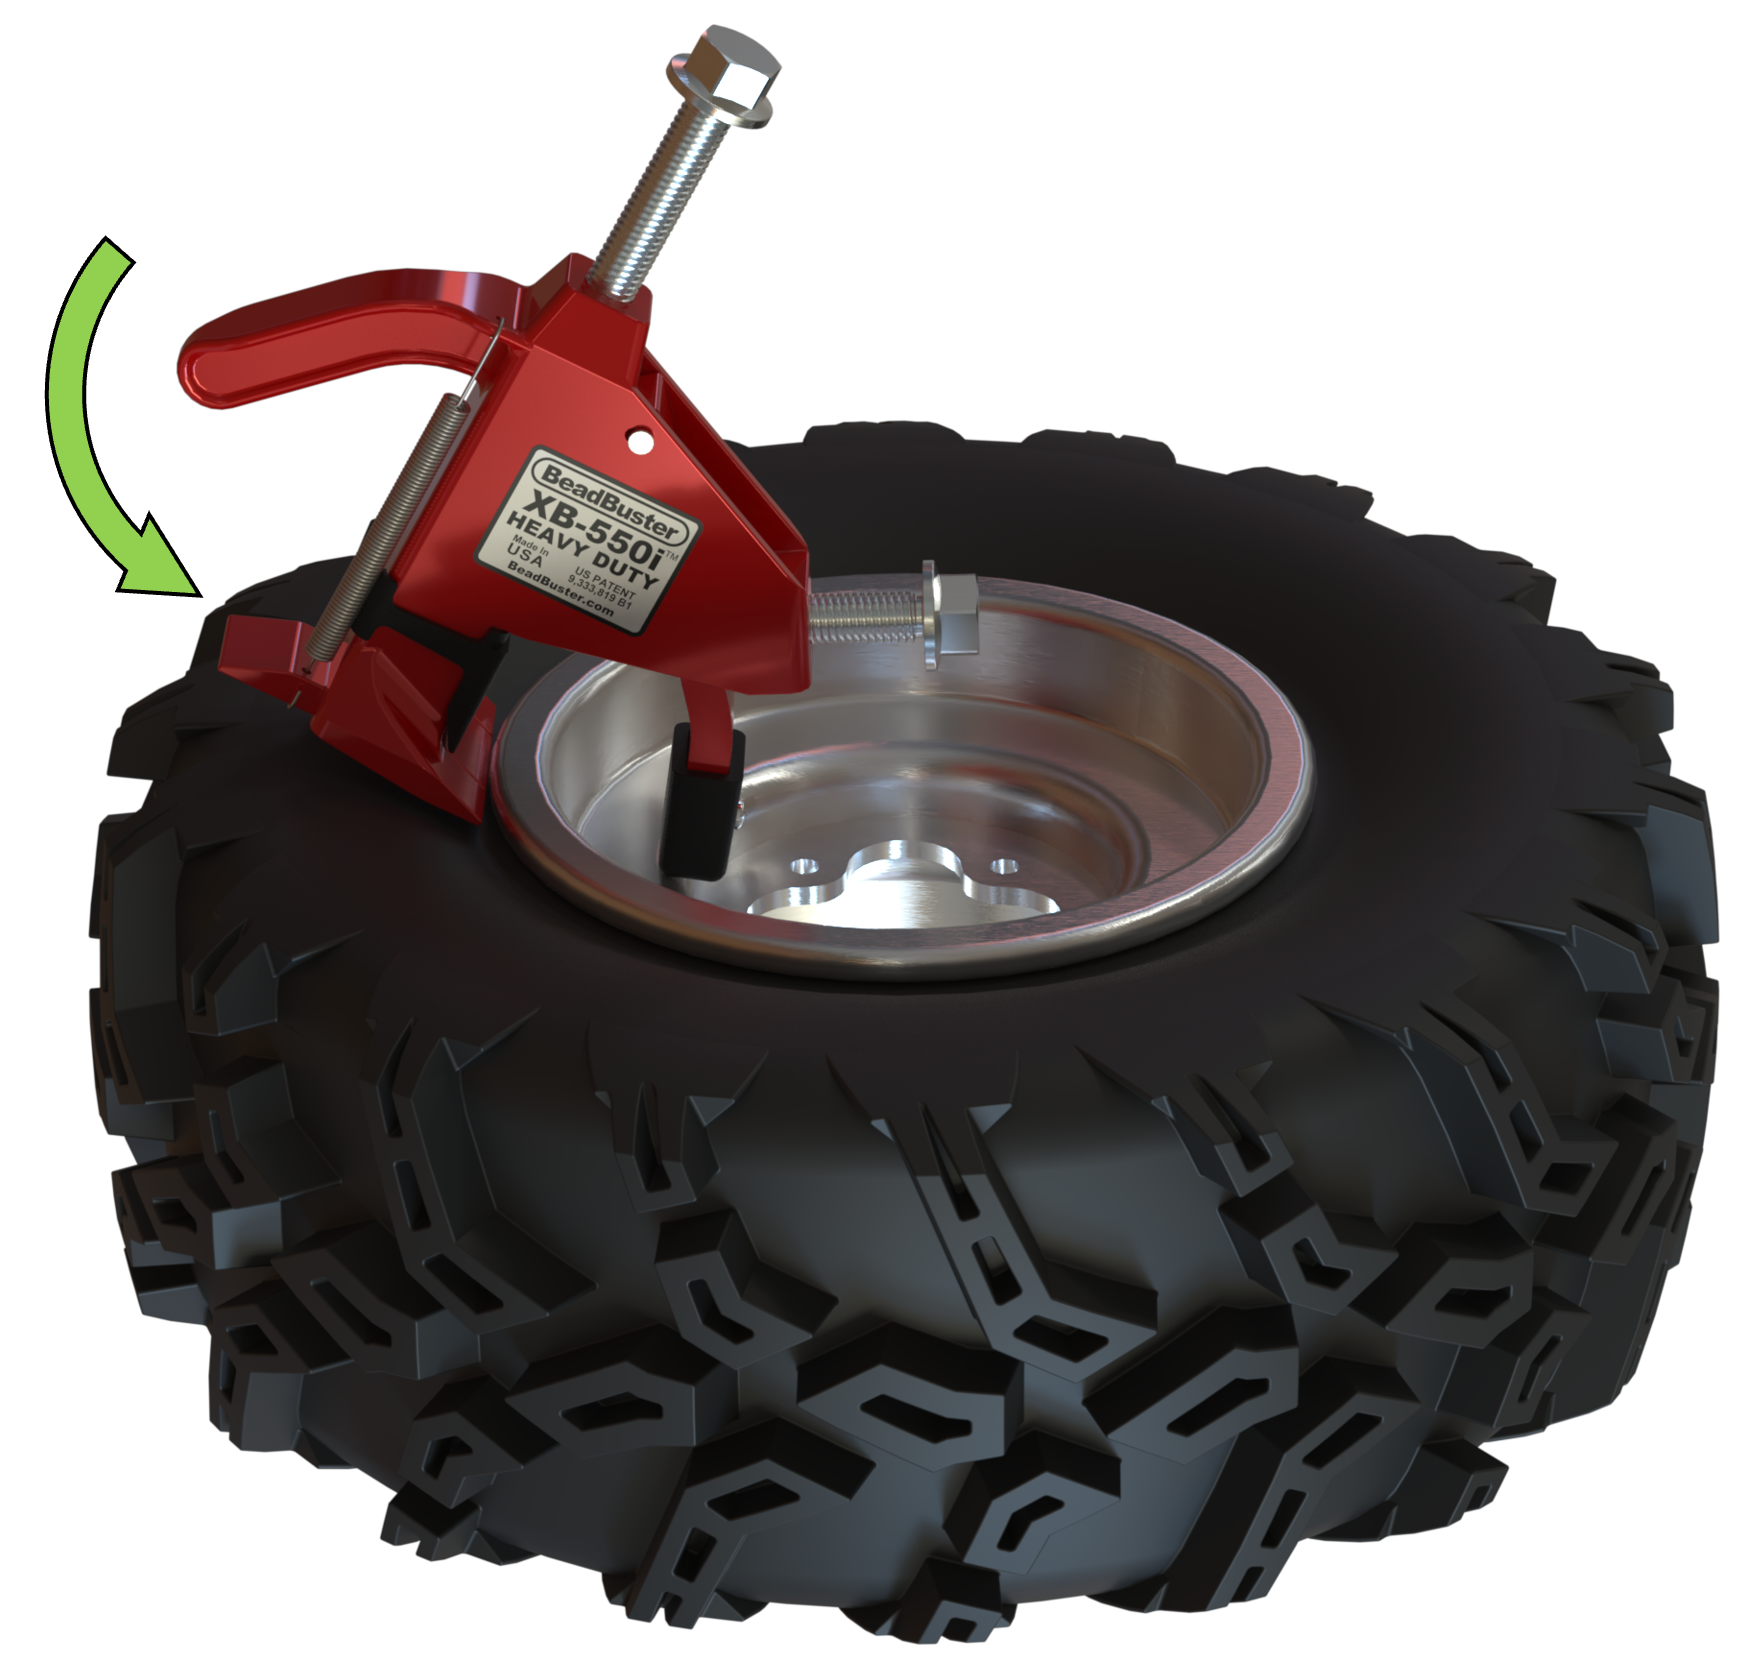
4. Use a 15/16” socket or wrench to tighten the clamp bolt to pull the feet all the way in and align the tool. You can use an impact wrench, ratchet, drill or hand wrench. Use caution with a 1/2″ pneumatic impact wrench to not over-torque the bolts, as you could damage the tool, tire and wheel.
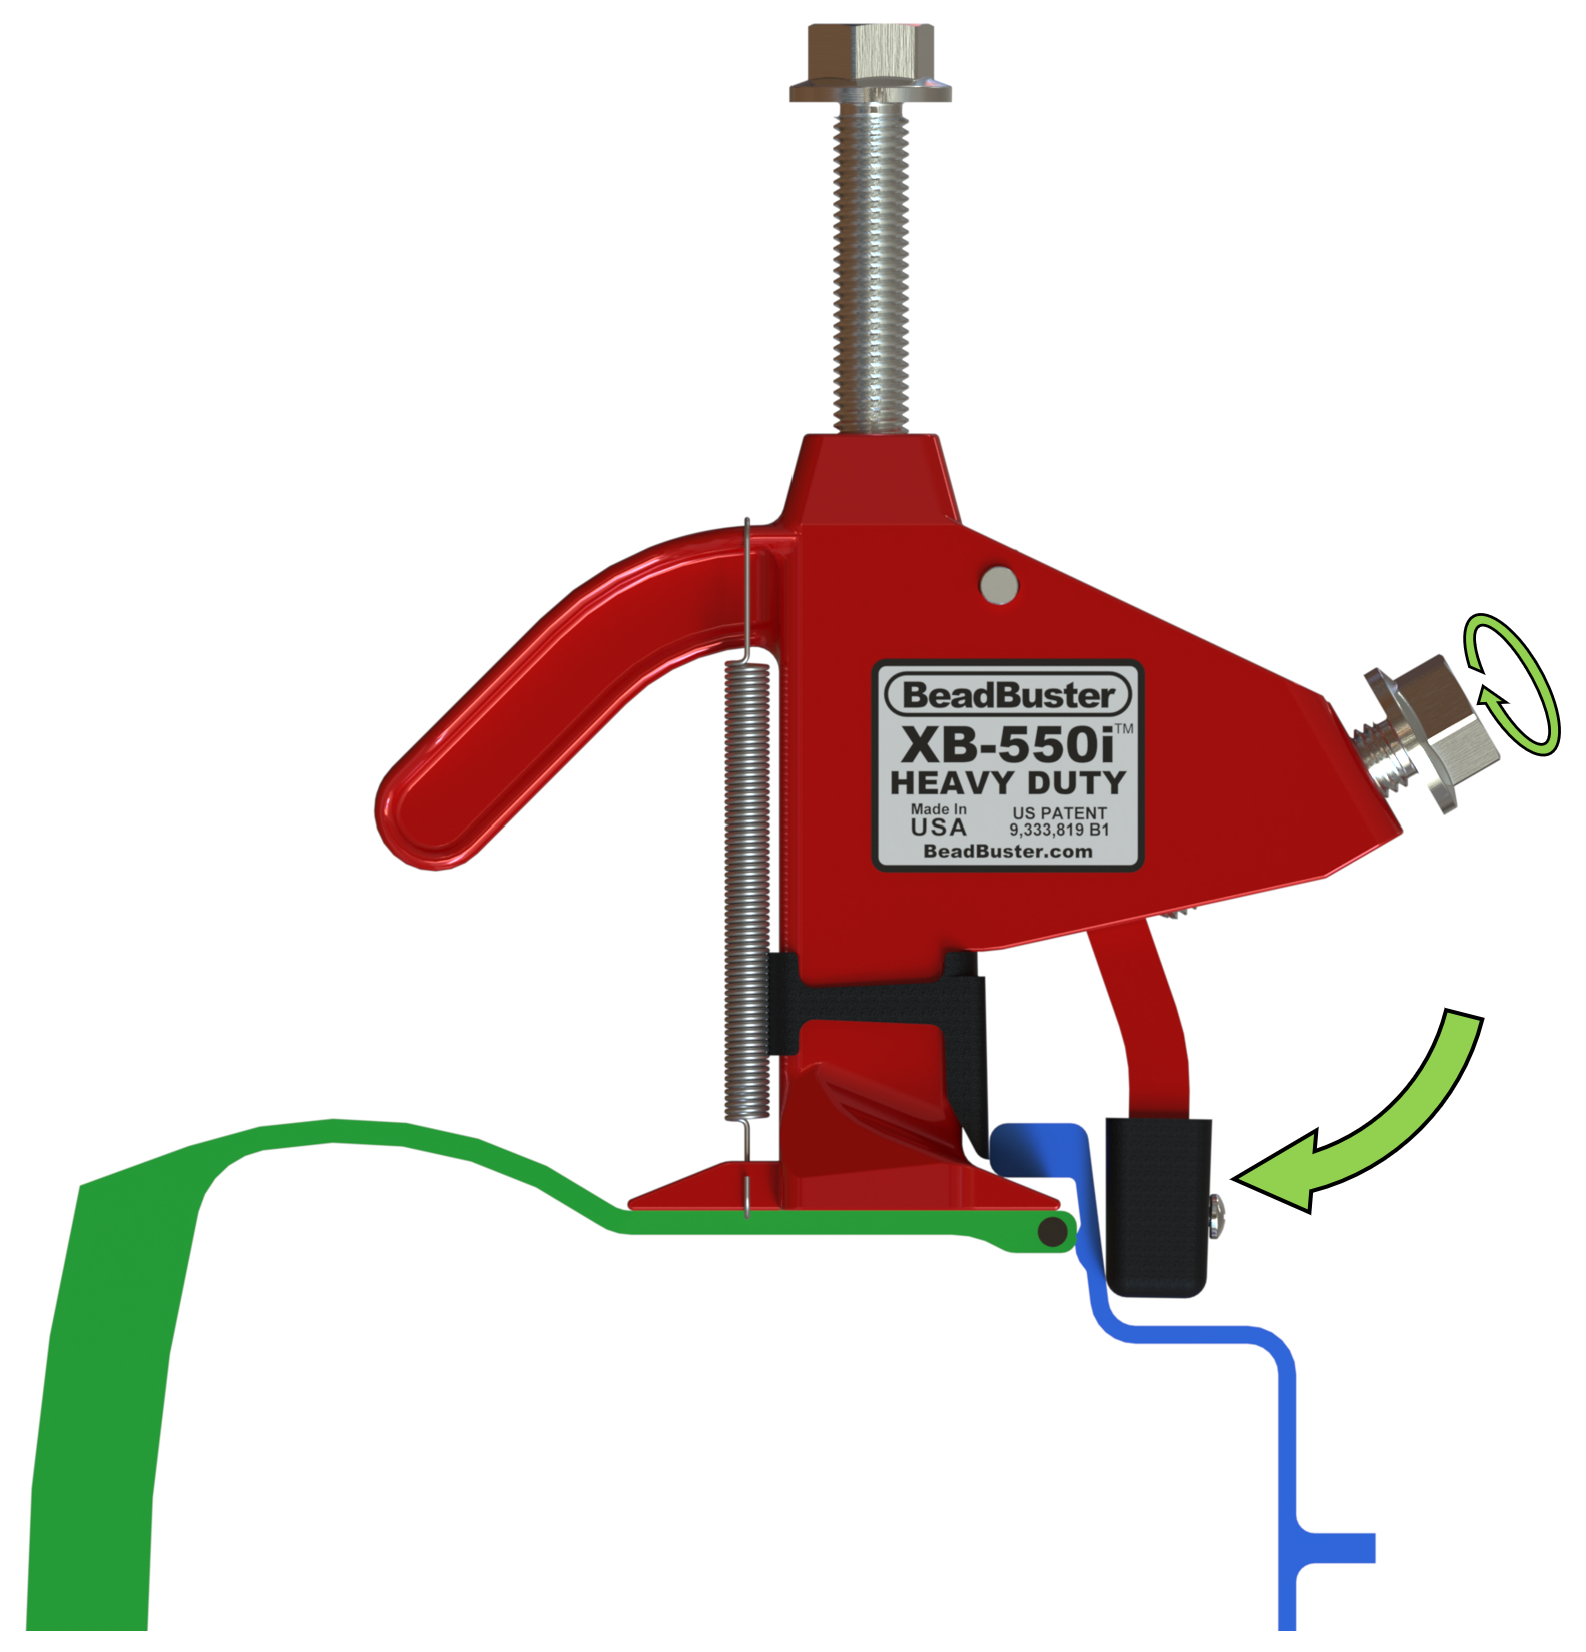
5. Use a 15/16” socket or wrench to run down the Ram Bolt until the tire bead has been pushed past the bead retainer on the rim. Again, an impact wrench can be used, but be cautious with a 1/2″ impact so that you don’t over-torque the bolt, which could strip the threads.
Depending on the age of the tire and condition of the rim, the bead may partially return to the seated position when the Ram Foot is retracted. If this happens, insert a small block of wood or plastic between the tire and rim to prevent it from re-seating.
The bead retainer on the rim will be visible after pushing the tire bead past it. It is recommended to visually inspect the gap during operation to ensure the Ram Foot does not catch on it.
There is a tendency to want eagerly to push the bead down all the way in one spot. Observe when the Ram Bolt has bottomed out on the top of the tool body, and make sure not to tighten beyond that point, or you can strip the threads with a powerful wrench.
6. Loosen the Ram Bolt and Clamp Bolt. If you cannot break the remainder of the tire bead loose by hand, move the BeadBuster XB-550i HD to another location on the rim, adjacent to where the bead is broken. Repeat the process at the next spot. On very old and stubborn small tires, you may need to use the tool 2-3 times around the rim. On stubborn large tires, it may take even more applications.
>> Agricultural and Other Large Rims <<
The BeadBuster XB-550i HD can be used on wheels still attached to the vehicle. With large wheels like tractors and other commercial applications, getting the feet started between the lip of the rim and the tire can sometimes be challenging. Some wheel designs have an ease-in opening spot that gives the feet a nice spot to get well inserted. Other wheel and tire designs are fitted almost completely flush with no reasonable gap.
For these types of wheels the following technique should be used to get the tool started:
-
Like with any tire, make sure to use generous amount of tire lube spray or soapy water.
-
Hammer a small flathead screw driver into the tire-wheel interface (the largest that will reasonably fit), and pry the tire bead to increase the gap.
-
Once the gap is opened a bit more, use a larger flathead screw driver or small pry bar to work the interface and open the gap even more.
-
Once the gap is worked open further, use a larger pry bar to get some strong leverage and create a gap large enough to get the BeadBuster feet well engaged in the tire-wheel interface.
-
Once the tips of the BeadBuster feet are set under the lip of the rim, then you can advance the clamp bolt as normal, which will provide sufficient drawing force to seat the tool fully in place.
-
DO NOT USE A HAMMER to help get the BeadBuster in position. When the BeadBuster is properly engaged in Step 5, hammering is not required to get the tool in place.
These steps illustrate the most severe condition that you will find in large wheels. Many cases will just require 1 or 2 series of screw drivers and pry bars. The key is to create a gap sufficient to get the BeadBuster feet properly under the lip of the rim.
