What Prevents Full Insertion?
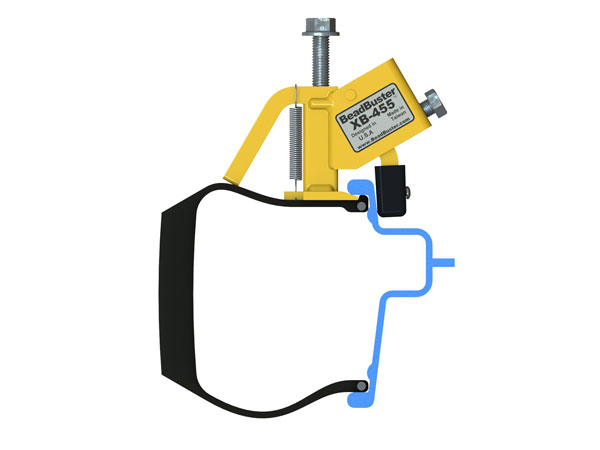
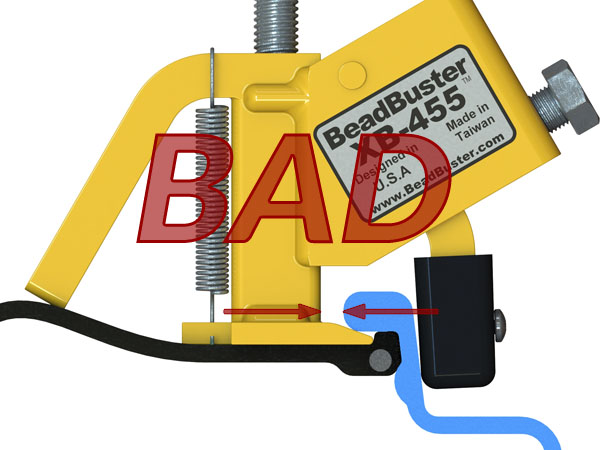
Sometimes very old tires can almost get ‘welded’ or bonded to the rim, especially if the rim is corroded. When the feet get inserted, the bead does not separate and make room as is the normal case, and the rubber around the bead bundle can bunch up in front of the BeadBuster feet…when that happens you definitely cannot get the feet fully and properly inserted. We have seen this with some new wheels also: some OEM’s have been known to use a type of glue or bonding agent that prevents the tire bead from separating away in a normal fashion. If you are uable to get full insertion of the feet, and a gap larger than 1/8 inch remains between the tool body and the rim, then you are likely running into some form of this problem. It’s important to observe if a larger than 1/8 inch gap remains after clamping the BeadBuster XB-455.
What is the Solution?
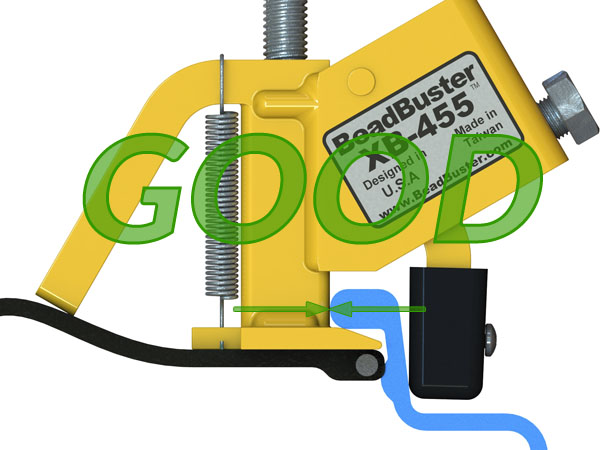
If you are experiencing this problem, you need to spend a little more time working on getting the feet fully inserted when clamping. The best method is to back off on the clamping, allowing the feet to slide back out of the interface a bit, and spray a generous amount of lubrication into the interface. You may have to do this several times. The idea is you are working that interface so that you get one spot of the rubber to break free from the inside face of the rim, allowing full insertion: patience and lubrication are key. Also, during this “work-in” stage, it is helpful to tighten the clamp more than normal, such that the tool may even start leaning in towards the rim, and then back off on the clamp bolt to allow the tool to align correctly, or be removed for re-lubrication. Make sure to have the tool aligned perpendicular to the rim before running down the ram bolt. Once you get the feet fully inserted, as shown, you can proceed with breaking the bead as normal. Don’t try to break the bead loose from the rim in one step. Instead, push the bead down 1/2 inch, insert a 1/2 inch block to stop the bead from snapping back into place, then move the bead breaker tool to another location 3 inches away and repeat the process, which we refer to as the “inch-worm” technique.
This process will result in the job taking a little longer than normal, but you can avoid damaging your BeadBuster XB-455, tire and rim if you follow these steps.


