AVOID OVER CLAMPING OF THE TOOL AND THE COMMON FAILURE MODE THAT CAN RESULT
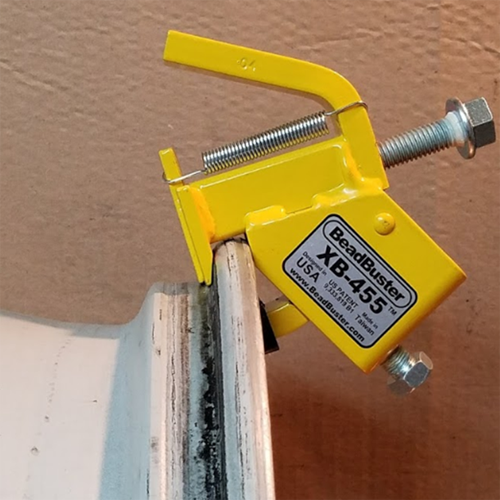
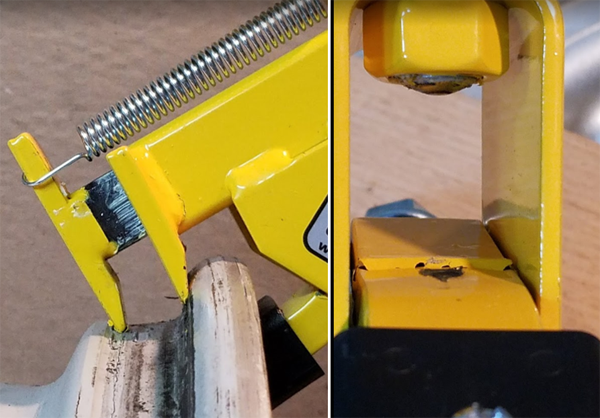
This issue is seen most often in Motorsports applications like Sprint Cars, and sometimes with ATV’s/UTV’s, especially on the back-side of the rim, away from the drop center. If the BeadBuster XB-450 is over-clamped, when the Ram Foot is pushed down, the tip of the foot will ride over the Bead Retainer, and also ride down the inside face of the rim. Because of the geometry and angle of the tool, the further down the Ram Foot goes, the further it pushes the Tool Body away from the rim, creating a gap. As it forces the tool body away from the rim, the Clamp Arm will get permanently bent, even though it is 1/2″ thick steel.
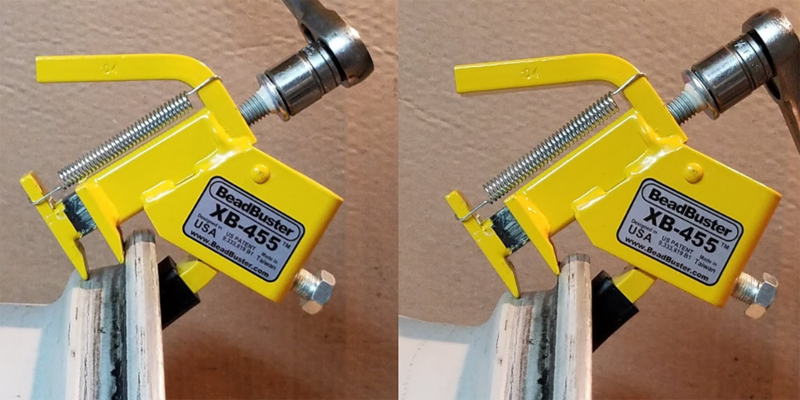
When the Hold Feet are in contact with the lip of the rim at their tips (instead of at the base near the tool body) an excessive moment arm (or torque) is imparted on the Hold Feet because all of the force pushing from the Ram goes through the Hold Feet into the lip of the rim. On Sprint Cars and ATV’s/UTV’s this moment can exceed the material strength of the 4130 Alloy Steel Hold Feet or welds, resulting in a failure. When the BeadBuster XB-455 is properly positioned, the Hold Feet and welds are many times stronger than the forces generated from even the most stubborn application.
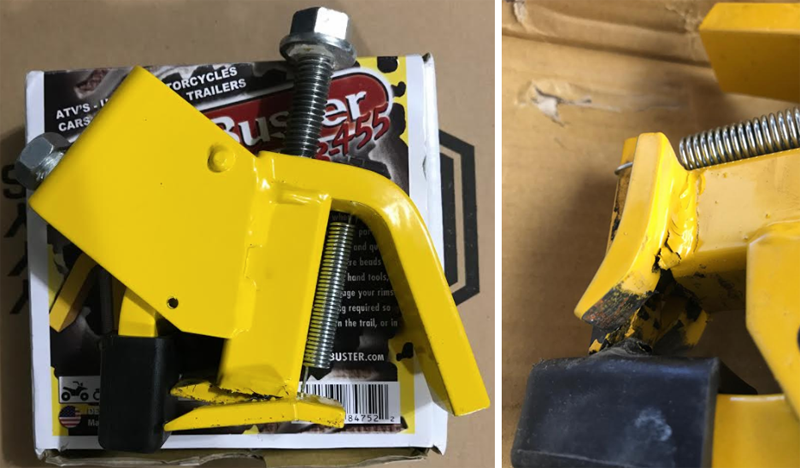
Sometimes the Hold Feet will not fail immediately or at all, but once the Clamp Arm is bent, the tool will never be able to be tightened adequately to the rim on subsequent applications, and you may experience the tool “slipping off” the rim when pushing down the Ram Foot.
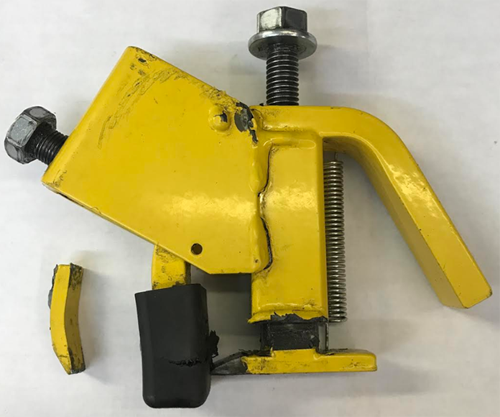
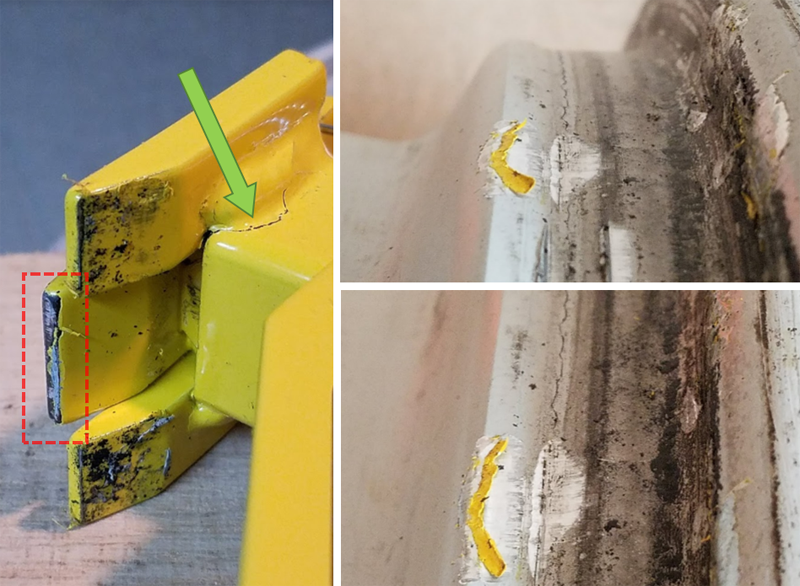
Some tell-tale signs of this happening are:
-
Skiving or scraping of material from the inside face of the rim from the Ram Foot
-
Paint worn away from the tip and underside of the Ram Foot (the tip of the Ram should never contact the rim when used properly)
-
Bending of the Clamp Arm indicated by cracked paint around the point of contact with the Clamp Bolt
-
Excessive damage or gouging to the contact face of the Clamp Pad. When properly used, the Clamp Pad should never see such high forces to cause material failure or gouging.
-
Breaking of the Hold Feet welds, or bending of the Hold Feet (the typical failure that customers notice)
-
Occasionally the Clamp Bracket welds will fail due to the excessive forces resulting in over-clamping
What Causes Over-Clamping?
All BeadBuster tools are suitable to be used with Impact Wrenches, however, with a Pneumatic impact wrench, you have to be careful to not let it get away from you when tightening the clamp bolt. Pneumatic impacts run very fast, and have more than enough torque at full power to over-tighten the clamp bolt. So in general, you have to use caution and prudence when using a pneumatic impact wrench with your BeadBuster.
Also, breaking beads is essentially a battle of friction between the tire and rim. The lower the friction, the easier the job is. We cannot stress enough the importance of using liberal amounts of tire mount lubricant while using the BeadBuster XB-455. Another typical sign of a customer reporting this failure, sometimes after just a few tires, is the tops of the Hold Feet and Ram Feet have all of the paint worn off. This is an indication that not enough or no lube at all was used. The paint will eventually wear off after many months of use, but not after just a few tire changes on a new tool with proper lubricant.
What is the Solution?
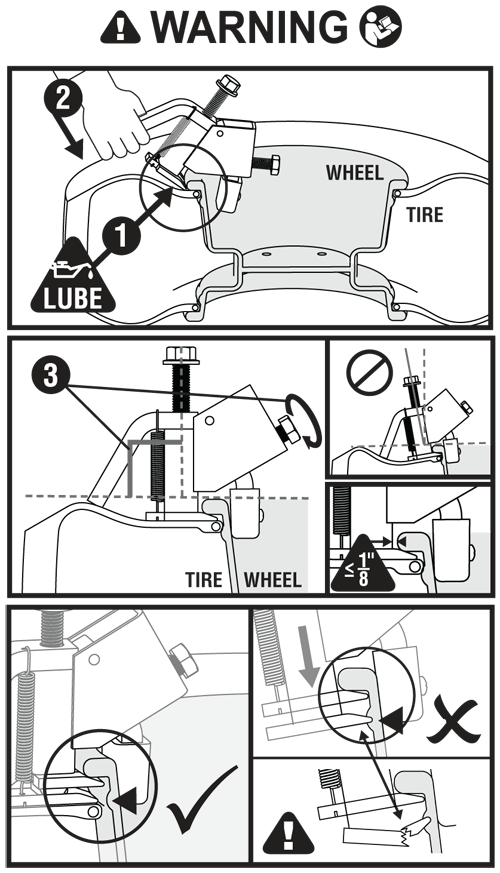
The solution is easy. We provide a warning tag with every tool that covers the essentials of proper use:
-
Use a good lubricant on the tire before installing the tool
-
Apply sufficient force through the handle to get the feet started before tightening the clamp bolt
-
Clamp the tool in place, and make sure that it is oriented perpendicular to the face of the rim
-
Inspect the clearance of the Ram Foot as you push it down, make sure it is not catching on any part of the rim
-
If something doesn’t feel right or seem right, STOP, remove the tool, and try again! Otherwise you risk damaging the BeadBuster or your Tire and Rim
