DOWNLOAD THE MANUAL
Watch the videos
Detailed Instructions, Tips & Tricks
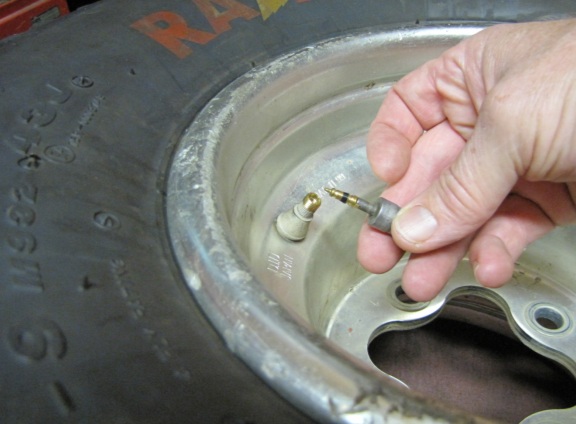
1. Remove the valve core to release air pressure from tire.
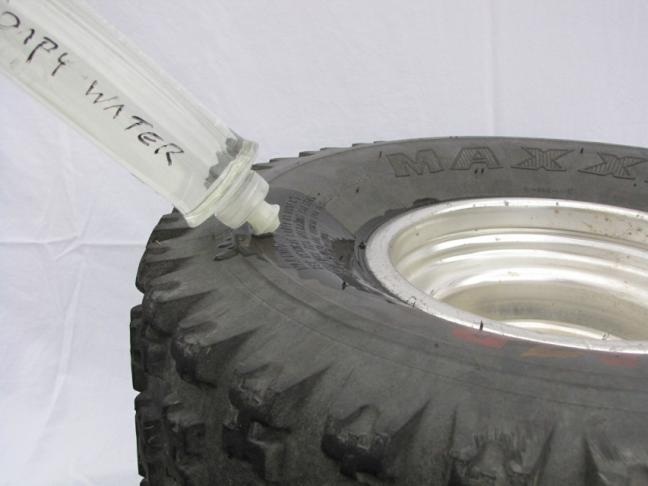
2. Start with the ‘shallow’ side nearest the drop center…this is usually the outside of the wheel. Apply soapy water (or other lubricant, like WD-40) to the bead. Push down on the sidewall to ensure that soapy water flows in between the rim and tire.
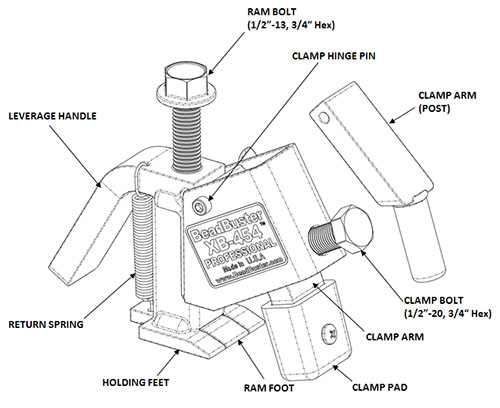
3. Press the feet of BeadBuster XB-454 in between tire and rim. Use the Handle to aid in getting the feet positioned. The soapy water helps it slide in. Pressing the feet down onto the sidewall 1st helps create a small gap for the feet to enter. Make sure the feet are started in the tire-rim gap before clamping.
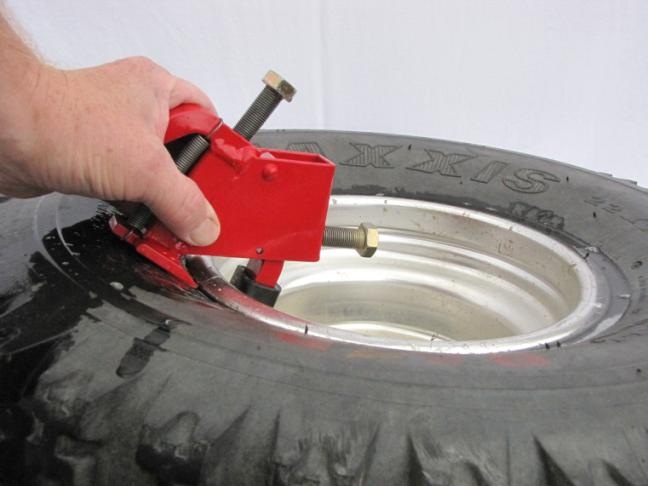
4. Use a 3/4” socket or wrench to tighten the clamp bolt to pull the feet all the way in and align the tool. You can use an impact wrench, ratchet, drill or hand wrench. A typical ATV tire requires 7-9 ft-lbs (112-144 in-lbs) of torque to get the feet in. Use caution with a 1/2″ impact wrench to not over-torque the bolts, as you could damage the bead breaker, tire and wheel.
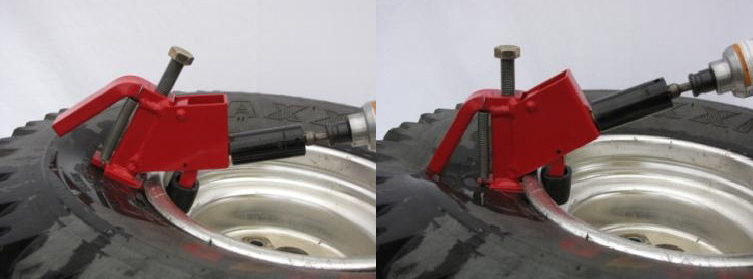
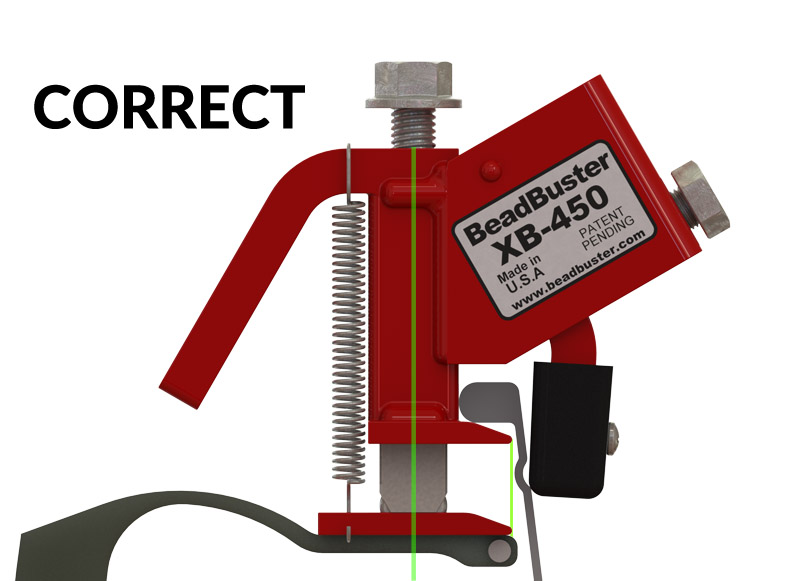
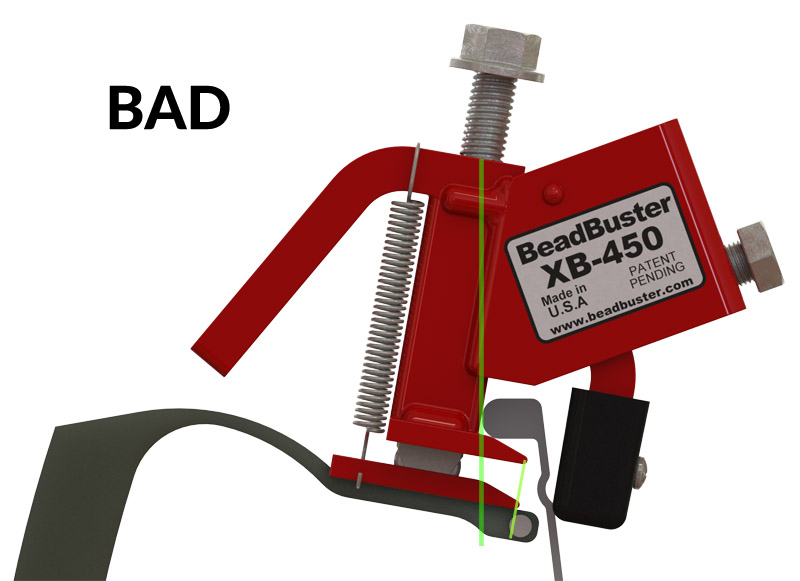
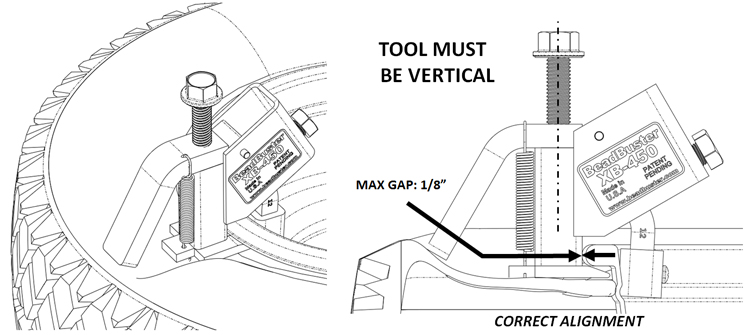
5. Tighten the Clamp Bolt until the BeadBuster XB-454 is perpendicular to the face of the rim, and the tool body is touching the rim. Make sure the BeadBuster feet are fully inserted, on some wheels when fully inserted, there may still be a small gap between the tool body and rim.
>> IMPORTANT NOTE <<
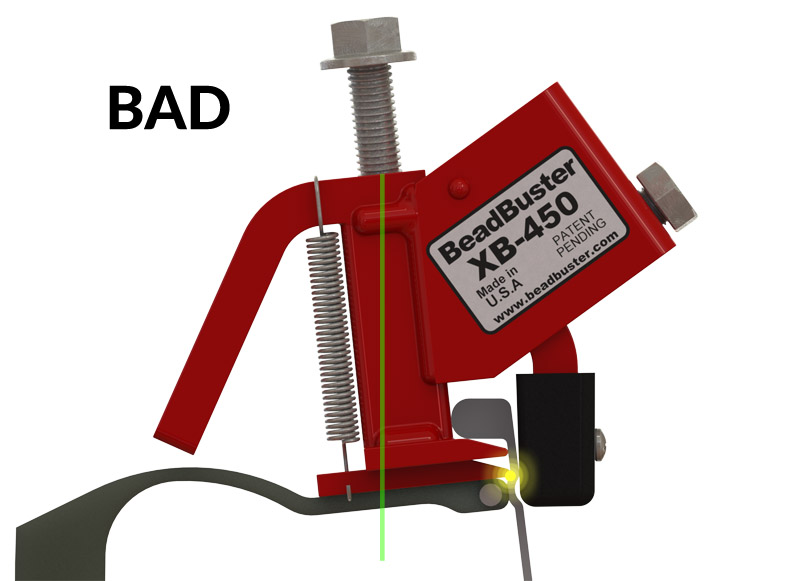
If the bead breaker is not properly clamped, and not correctly aligned with the rim, the Ram Foot may be bent or damaged while breaking the bead!
-
If Over-Clamped and the tool is leaned in toward the rim, the Ram Foot could gouge the bead retainer causing damage to both the tool and rim. This is the most common problem users have with using the BeadBuster.
-
If Under-Clamped and leaned away from the rim, the Ram Foot could slide down the sidewall and possibly damage the tire.
Often, in order to get the feet fully inserted, you have to 1st clamp so much that the tool does lean into the rim, which is OK. After you get the feet fully inserted, back off of the clamp bolt until the BeadBuster XB-454 is realigned perpendicular to the rim, but still fully inserted.
As with any tool, use care while operating the BeadBuster.
6. Use a 3/4” socket or wrench to run down the Ram Bolt until the tire bead has been pushed past the bead retainer on the rim. Again, an impact wrench can be used, but be cautious with a 1/2″ impact so that you don’t over-torque the bolt, which could strip the threads.
Depending on the age of the tire and condition of the rim, the bead may partially return to the seated position when the Ram Foot is retracted. If this happens, insert a small block of wood or plastic between the tire and rim to prevent it from re-seating.
***CAUTION***
Do not allow fingers or body parts to get pinched between the bead and rim!
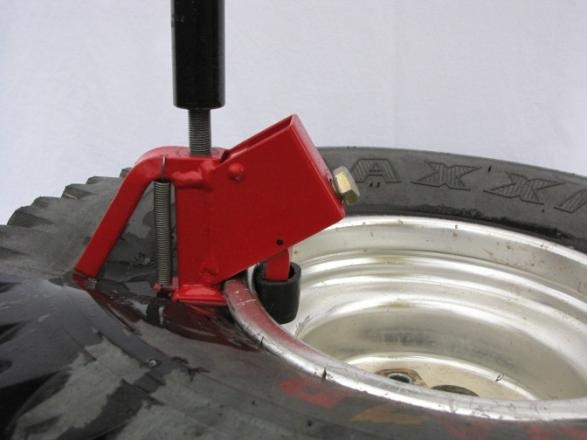
7. The bead retainer on the rim will be visible after pushing the tire bead past it. It is recommended to visually inspect the gap during operation to ensure the Ram Foot does not catch on it.
There is a tendency to want eagerly to push the bead down all the way in one spot, however the BeadBuster XB-454 only has 1.438″ of travel. Observe when the Ram Bolt has bottomed out on the top of the tool body, and make sure not to tighten beyond that point, or you can strip the threads with a powerful wrench.
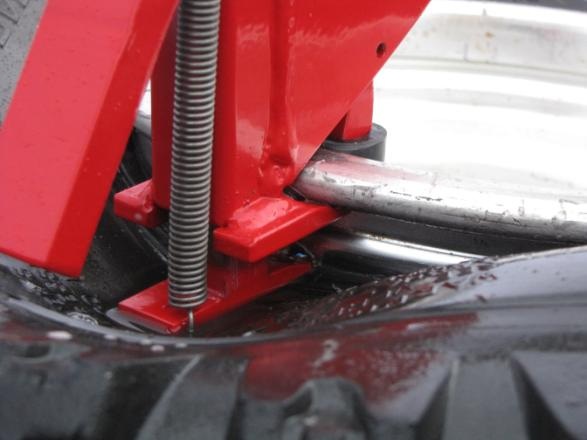
8. Loosen the Ram Bolt and Clamp Bolt. If you cannot break the remainder of the tire bead loose by hand, move the BeadBuster XB-454 to another location on the rim, adjacent to where the bead is broken. Repeat the process at the next spot. On very old and stubborn tires, you may need to use the tool 3-4 times around the rim.
Some wheel types (such as Sprint Cars) have a very tight interference between the Tire and Wheel, and the force required to break the bead is very high. The stock XB-454 PRO Ram Foot can withstand a tip load of at least 5,000 lbs, so although you are unlikely to break a ram foot you may certainly destroy a tire, and cause a dangerous situation. The reason is because when you start to break the bead on one side of the wheel, it is putting the steel cord (Bead Bundle) in hoop tension, and you are essentially stretching it.
For these cases, even some very stubborn ATV wheels, to prevent bending the ram foot you need to avoid trying to use the full travel of the Ram Foot. Instead, you need to take more frequent, smaller ‘bites’ around the rim. We call it the “Inch-Worm Technique”. Break the bead in one spot, extending the Ram ony about 3/4″-1″, and then work your way around, every few inches…this will minimize how much you have to stretch the Bead Bundle. This technique is necessary only on the most stubborn wheels, and sometimes on wide ATV wheels, on the side opposite of the drop center.
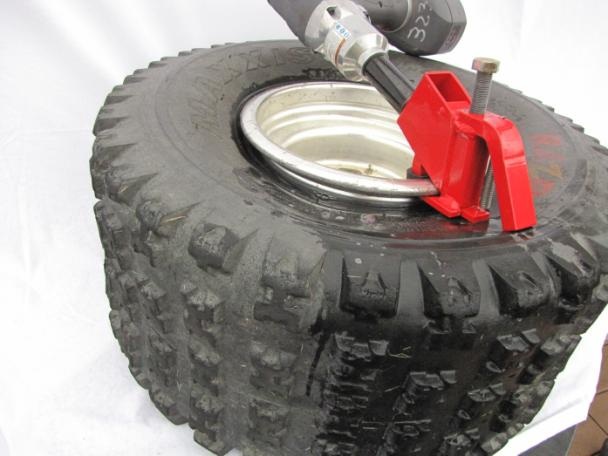
INSTRUCTIONS FOR REINFORCED RIMS
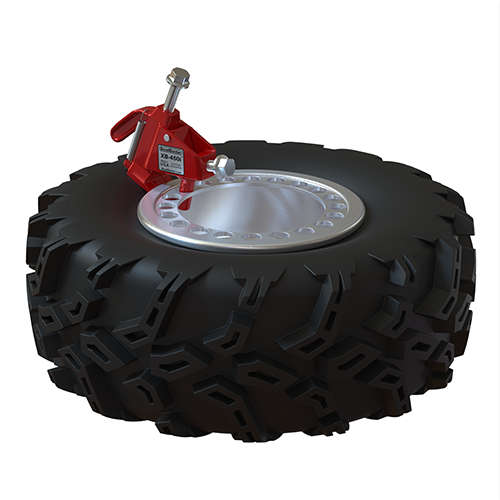
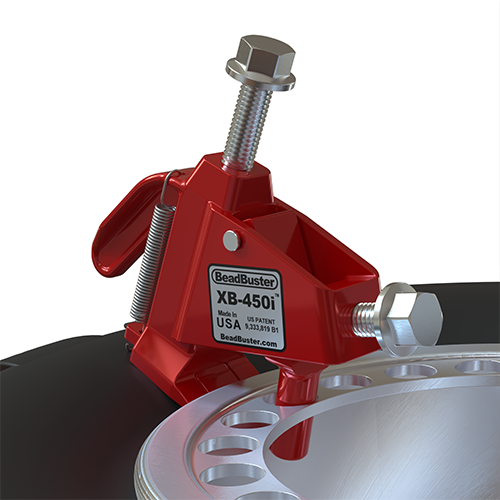
Reinforced Rims (aka. ‘Rock Rings’) require the standard padded Clamp Arm to be swapped out with the included Clamp Post. Otherwise, the operation is essentially the same. The clamping force really needs to be applied just in front of the feet, on the other side of the wall of the rim, and the clamp post allows you to get through one of the holes in the Reinforcing Ring, so that you can properly clamp.
The only other difference is it takes a bit more effort to get the feet pre-inserted before you tighten the clamp bolt. Make sure to use lots of lubrication, and simply use your body weight to generate some extra force to compress the tire side wall to get the feet started .
