
XB-650i Ram Screw Rebuild Kit Instructions
STEP 1 - Strip down Tool
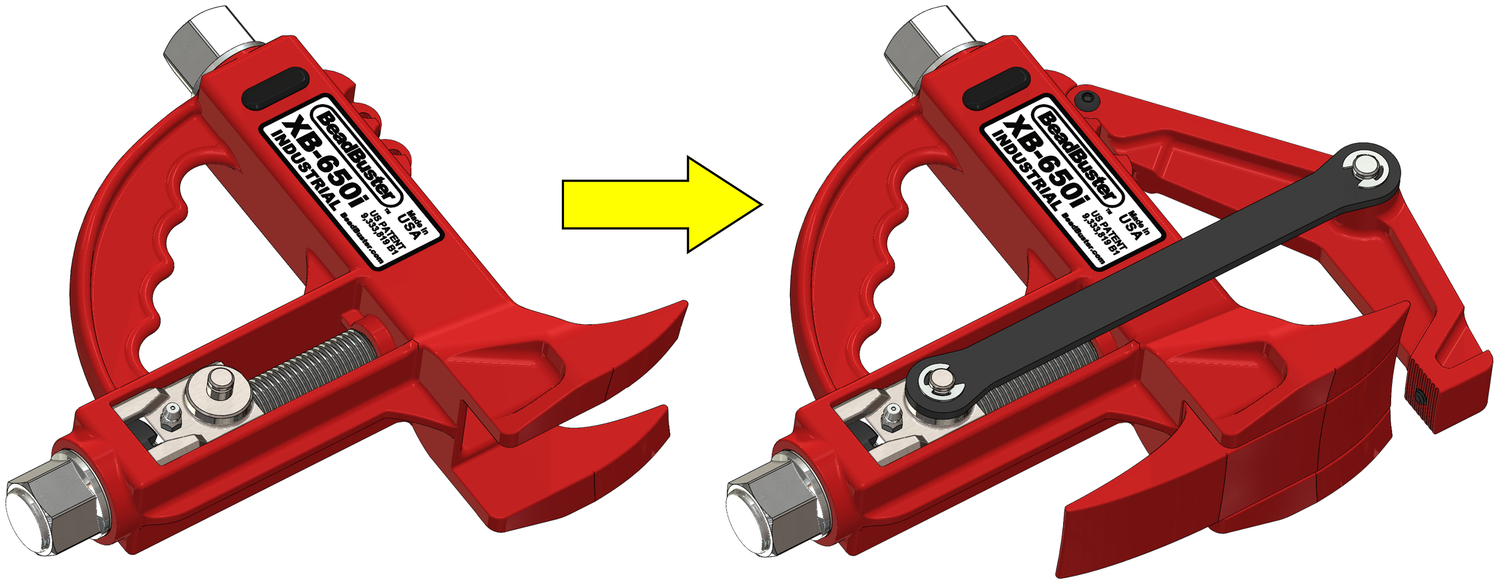
Remove the following parts to make the XB-650i Tool Body easier to work on:
- Clamp Arm
- Clamp Straps
- Ram Foot
- Body Window Plug
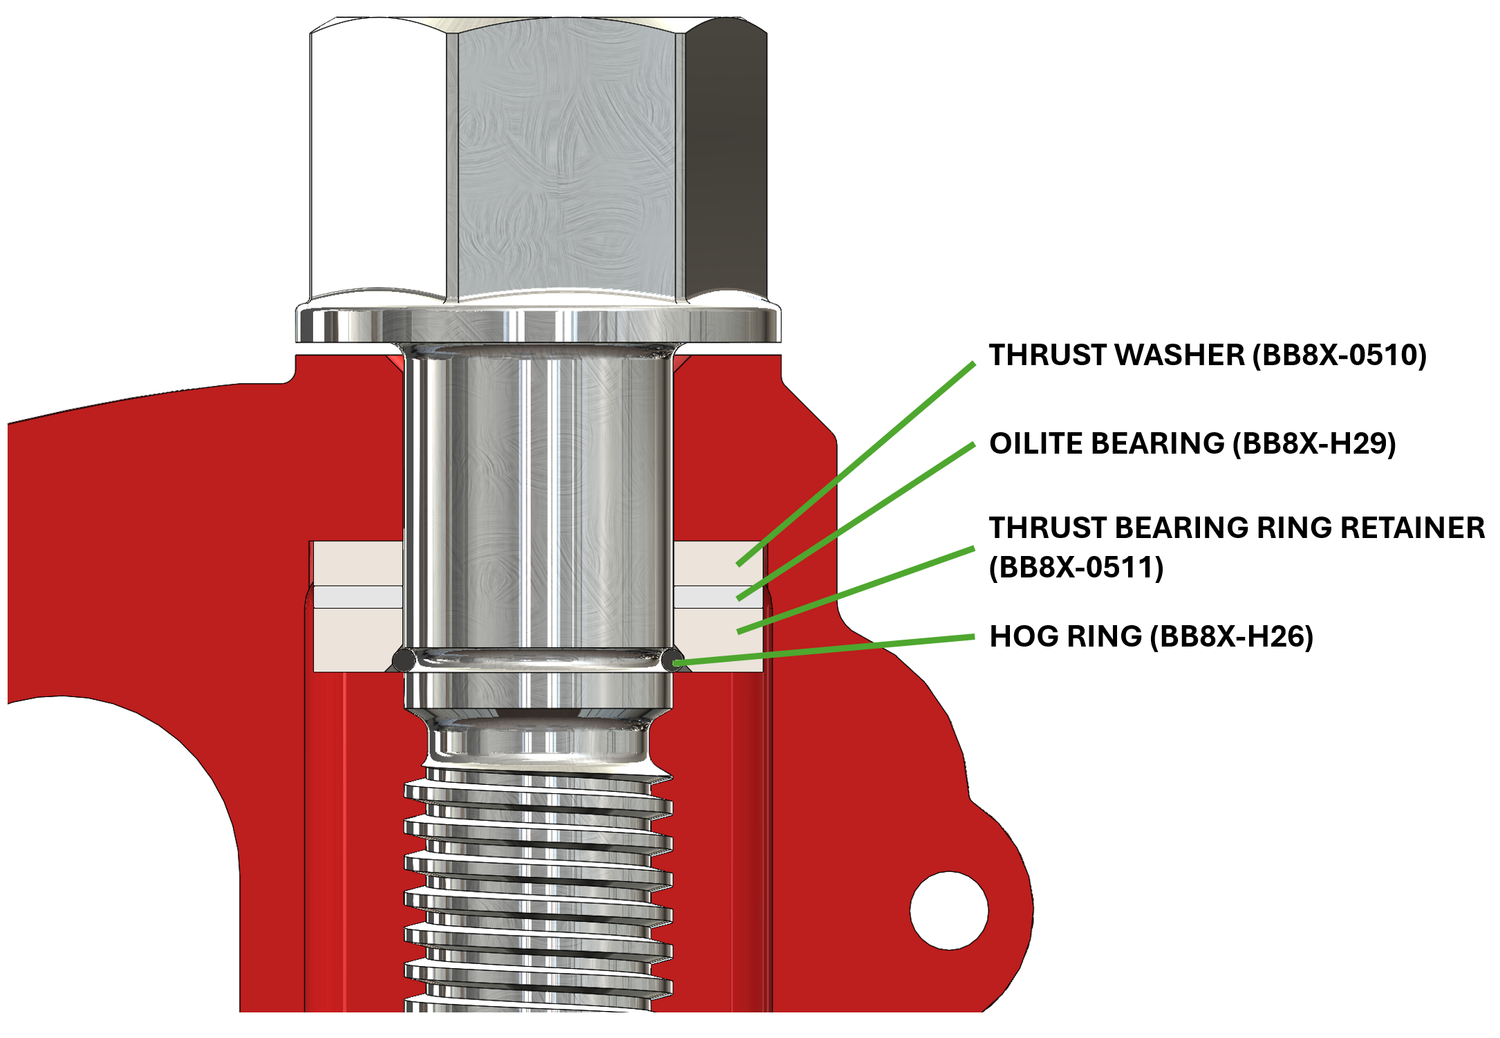
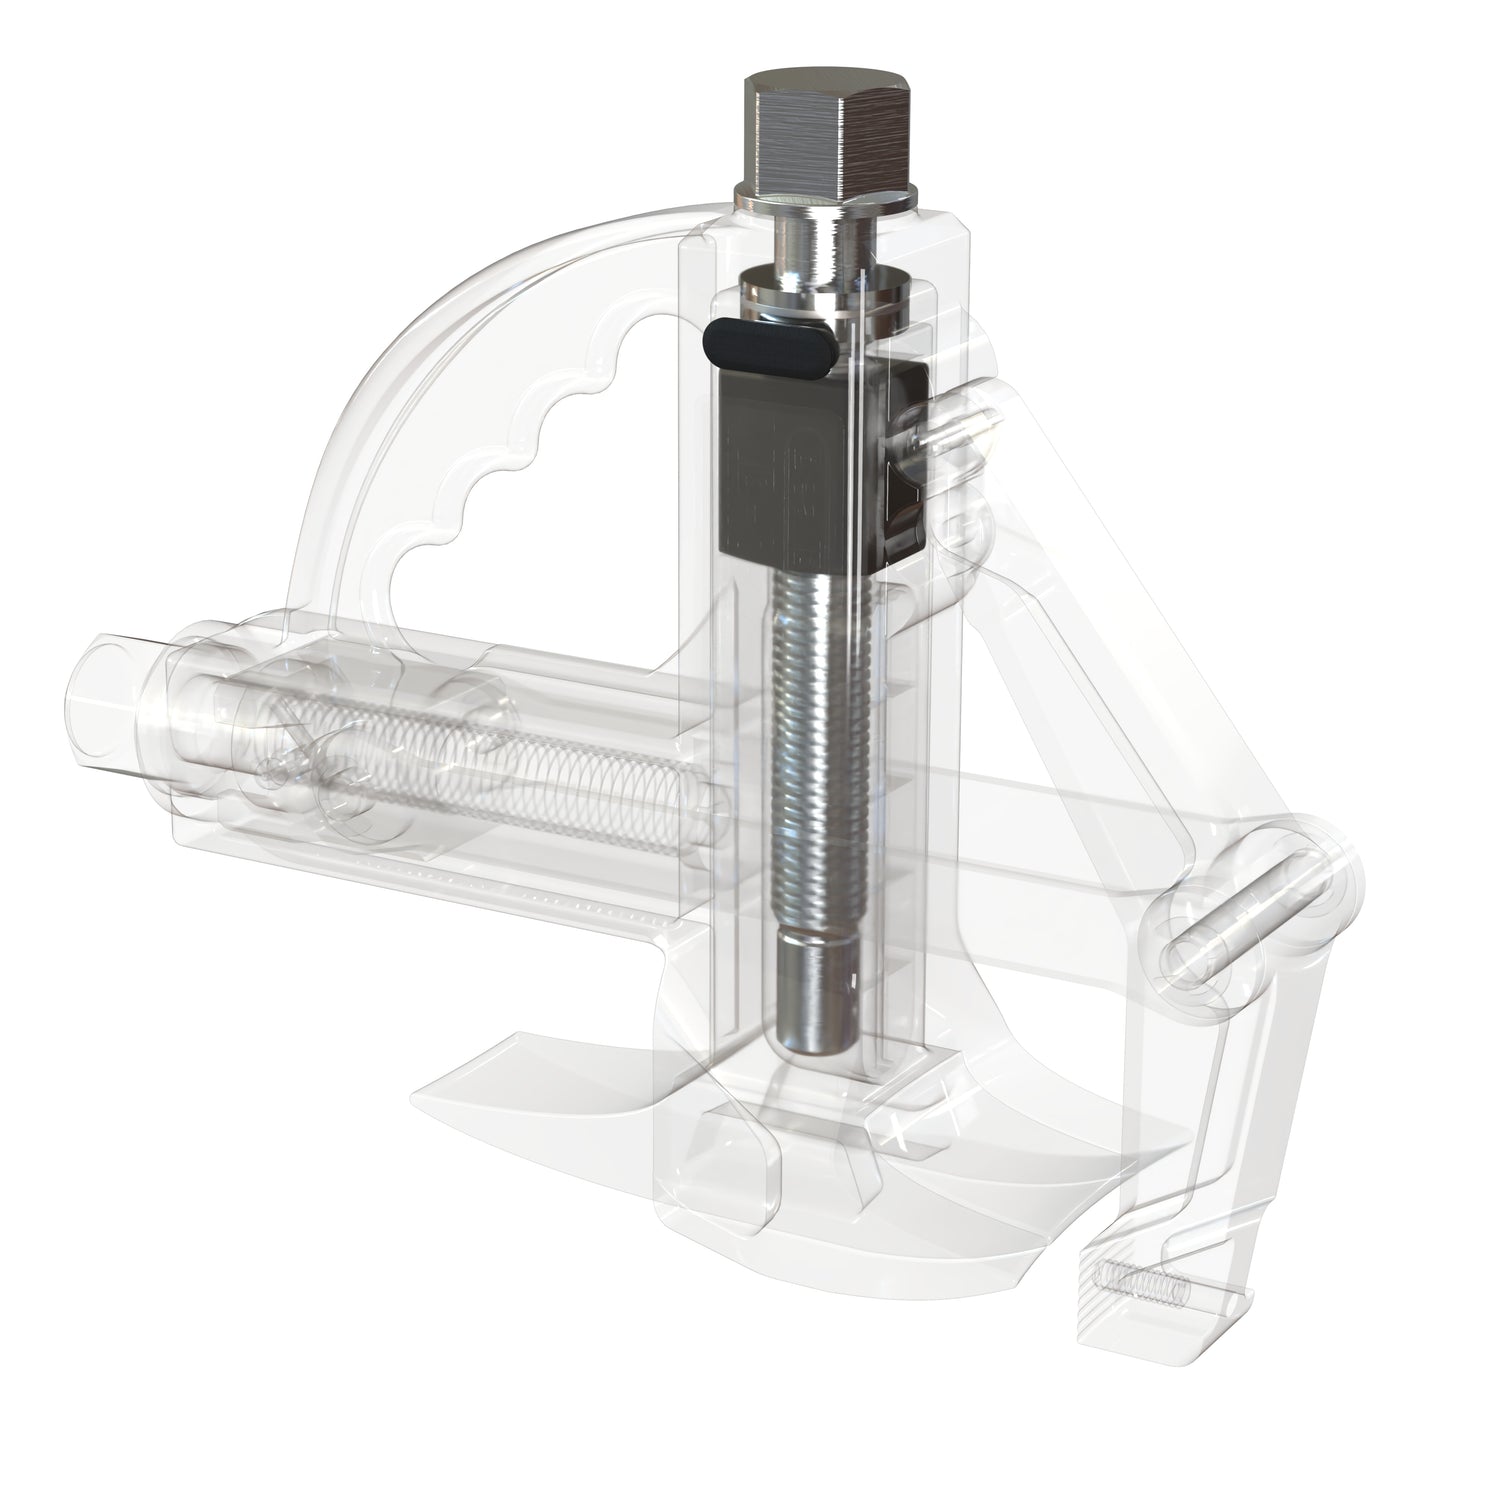
Ram Screw Retention Parts
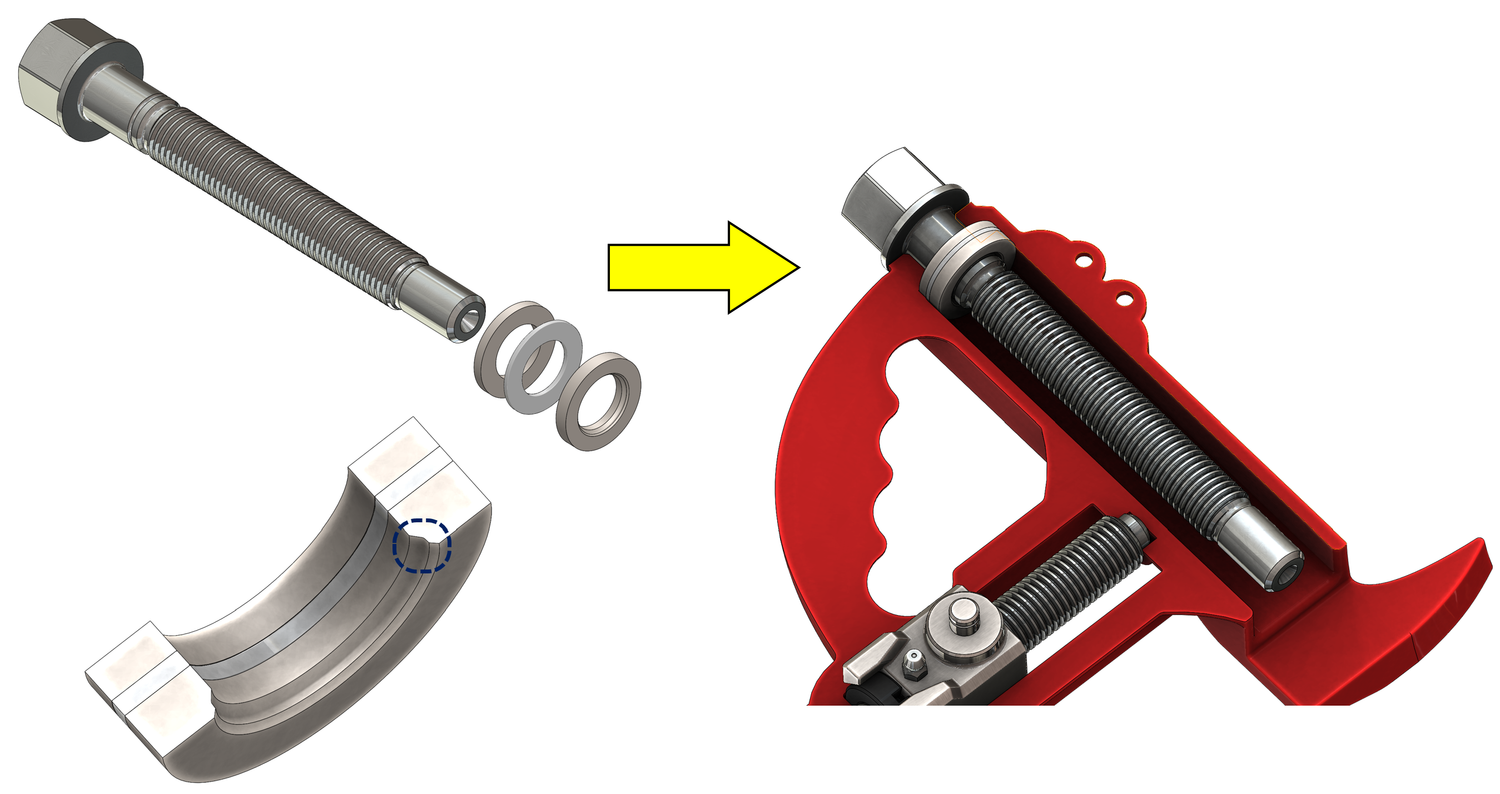
It is important to understand how the Ram Screw is retained inside the Tool Body. An oil-impregnated (Oilite) Thrust Bearing is sandwiched between 2 Thrust Washers. The lower Thrust Washer has special features to retain and compress the Hog Ring, which snaps into a groove in the Ram Screw.
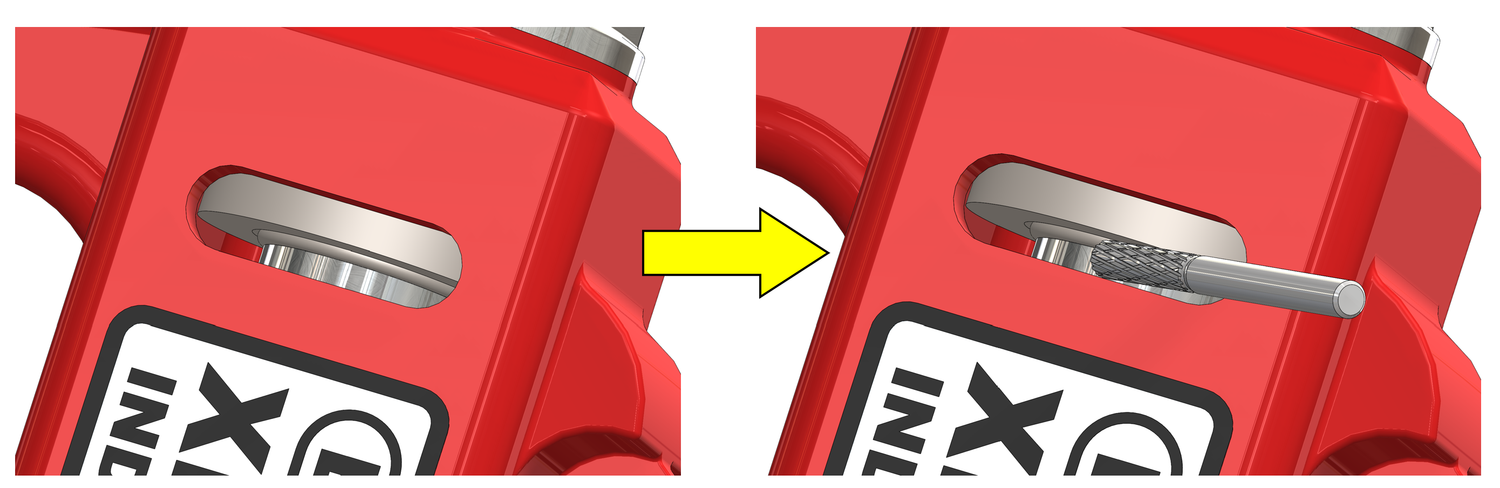
STEP 2 (OPTION A) - Cut the Hog Ring
In order to remove the Ram Screw for replacement, the Hog Ring must be removed. There is not sufficient access for retaining ring pliers, but the Hog Ring can be cut with an appropriate grinding bur. A 1/8 shank (Dremel Style) carbide flat cutting cylinder bur with a 1/8" or 3/32" dia. is recommended.
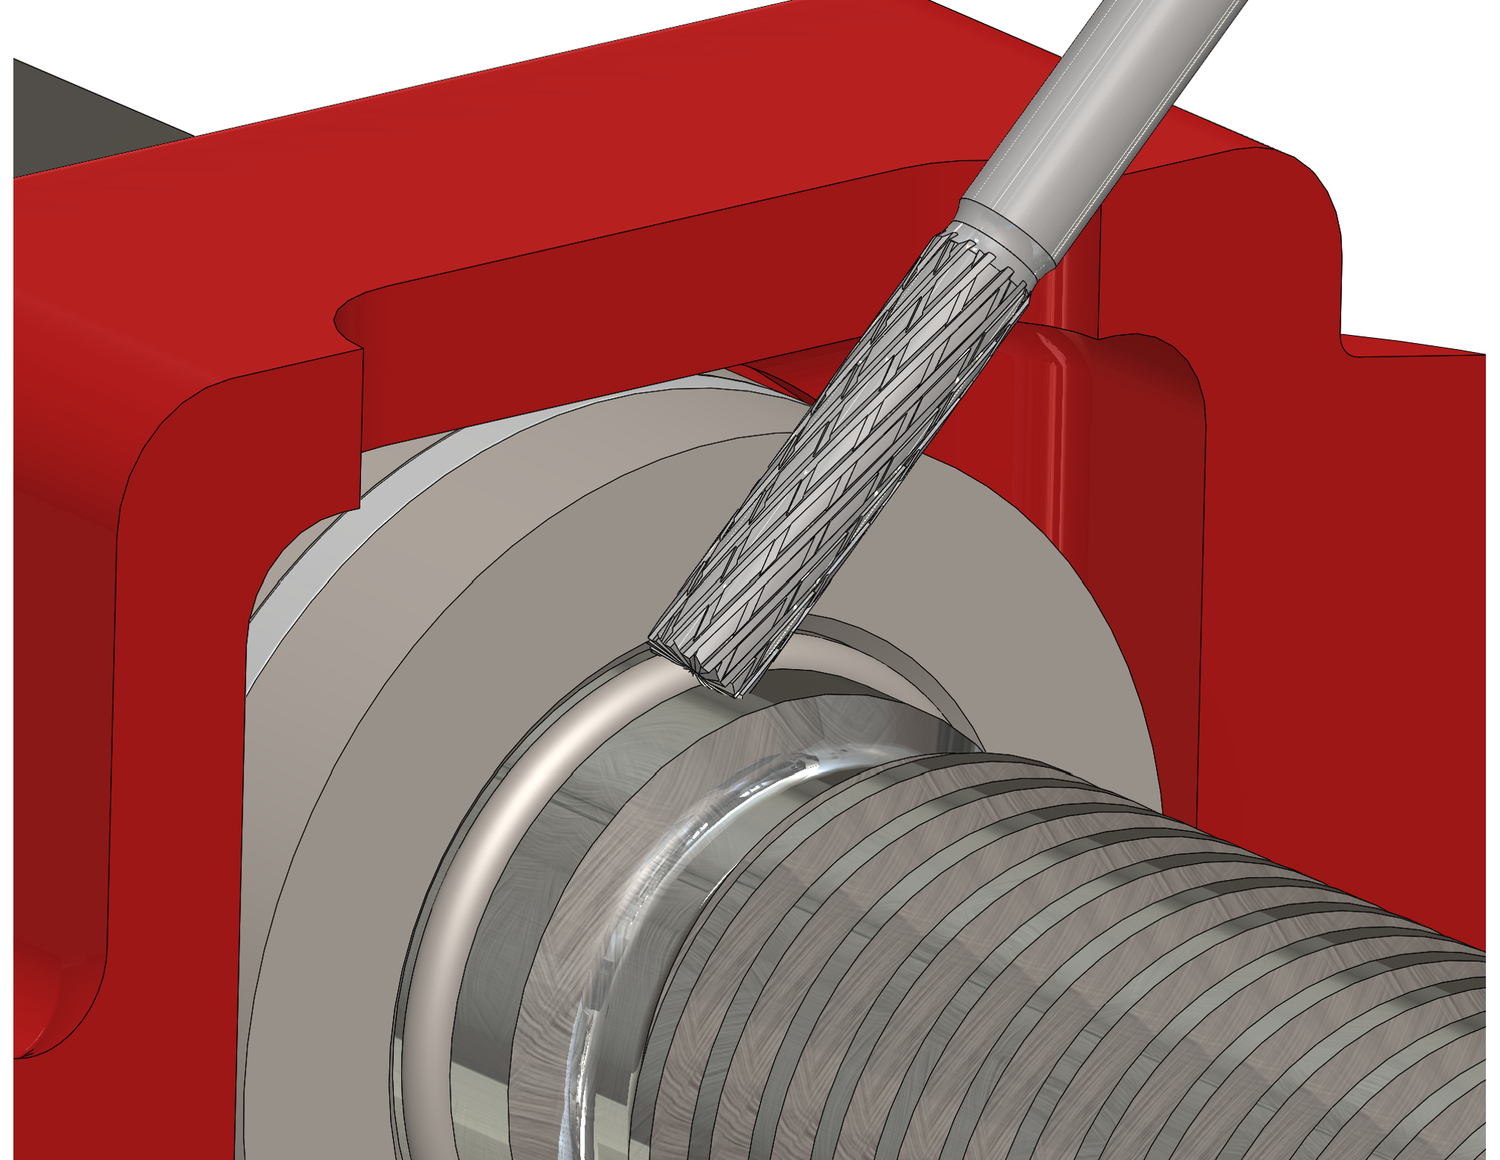
The Thrust Washer, Hog Ring and Ram Screw are all hardened alloy steel, so a carbide or diamond bur is required. Only the Hog Ring needs to be cut, but to do so all 3 parts will have material removed, which is OK because they will all be discarded when replacing the Ram Screw with the Rebuild Kit. There should be sufficient access with the window in the Tool Body to make the cut.
USE CARE not to grind away material on the edge of the Tool Body Window. Once the Hog Ring is cut, remove the Screw from the Tool Body, and remove the thrust washers and pieces of the Hog Ring.
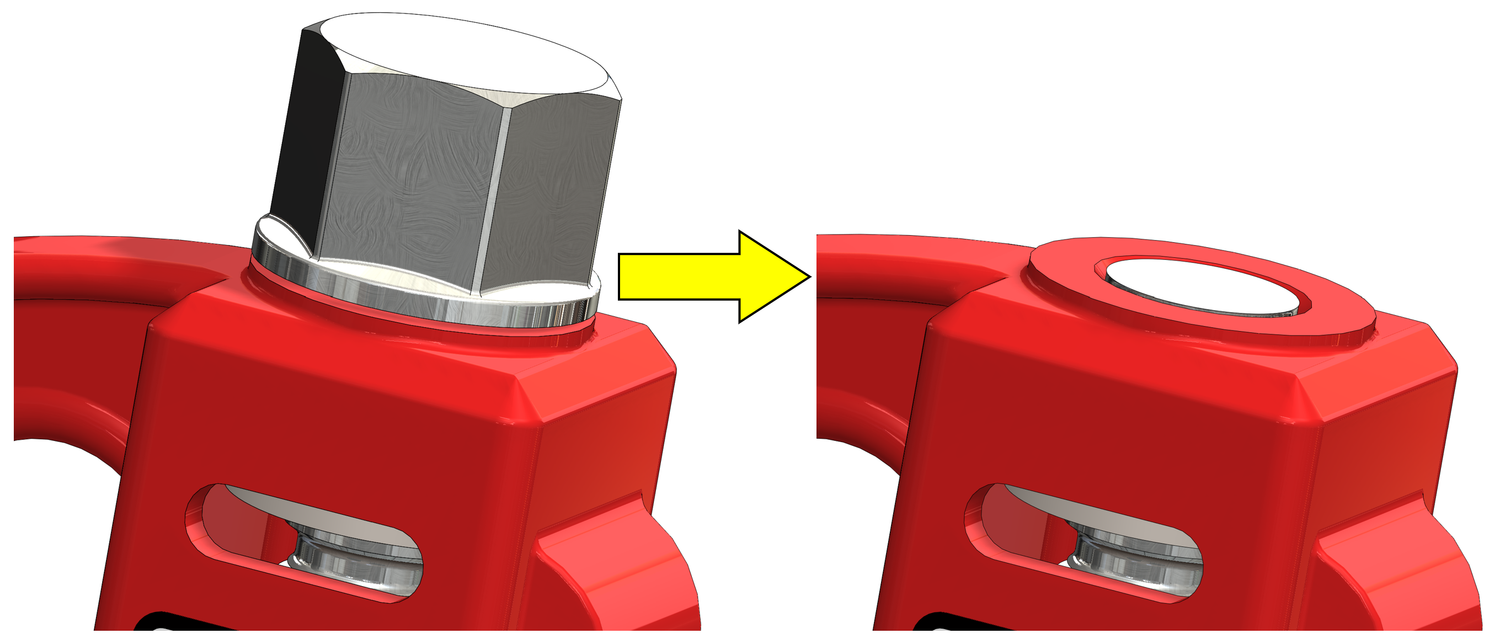
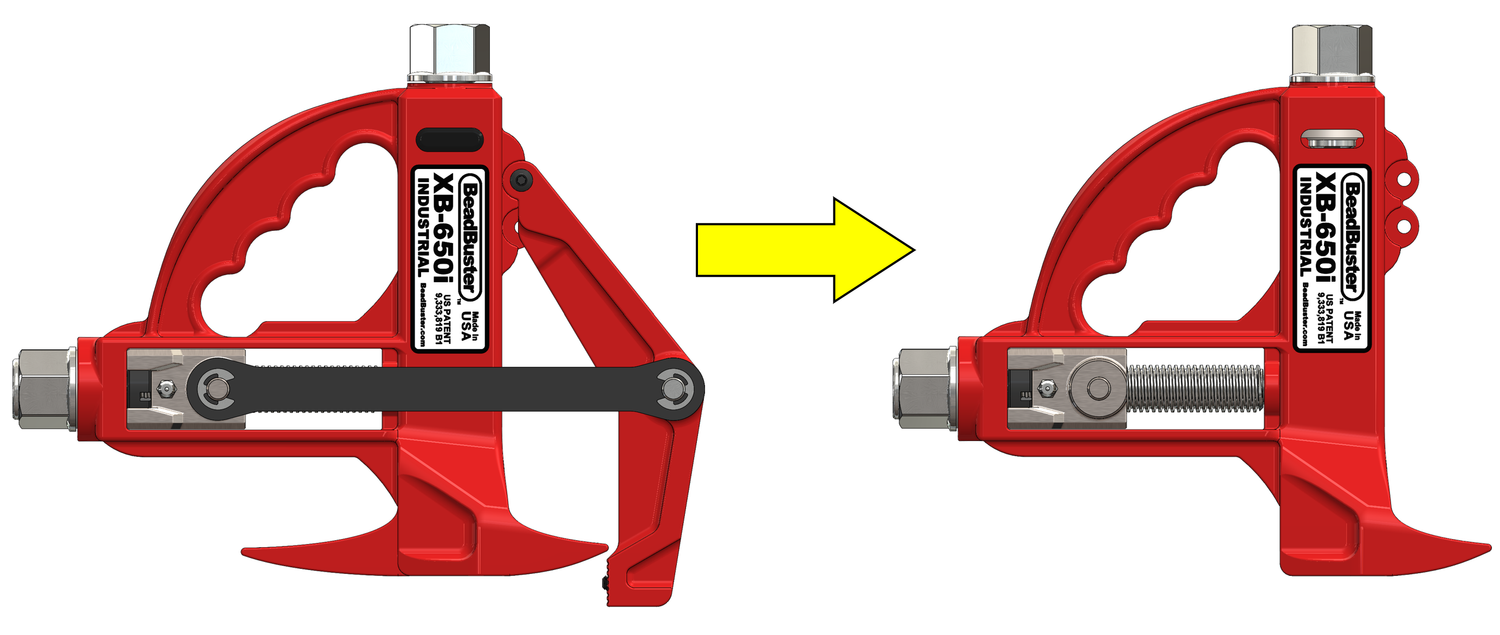
STEP 2 (OPTION B) - Cut the Ram Screw Hex
The other option to remove the Ram Screw is to cut off the Hex Head of the Ram Screw, if you have the required equipment to do so. An abrasive chop saw, angle grinder, or band saw can be used. The Ram Screw is hardened to HRC 37-45.
It is VERY IMPORTANT to not cut into the top face of the Tool Body. Once the Hex is cut off, remove the Screw from the bottom of the Body.
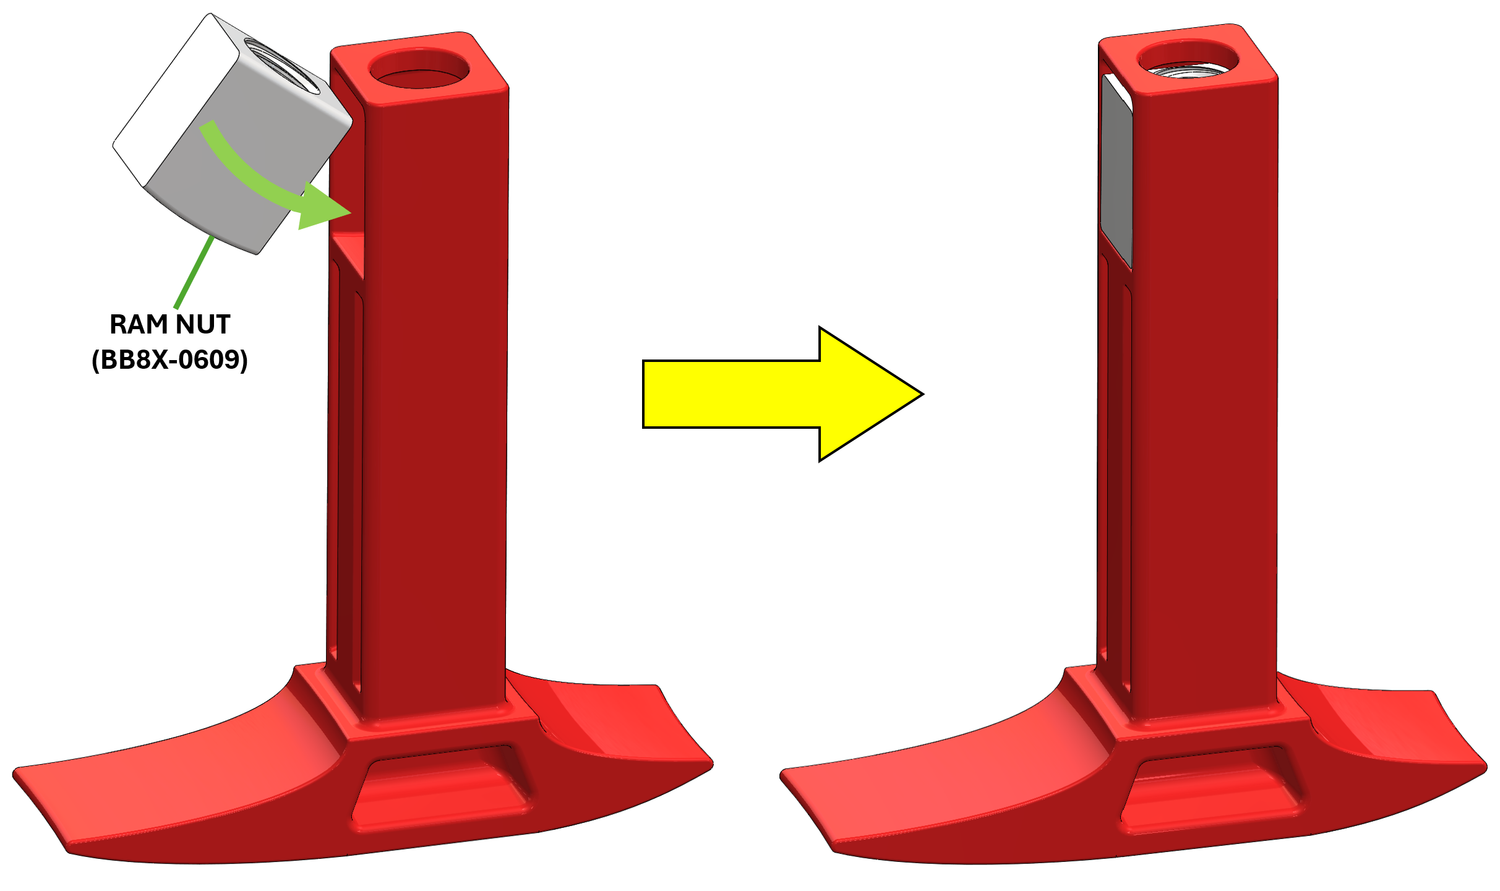
STEP 3 - Install the Ram Nut in the Ram Foot
A new Ram Nut is provided with the Rebuild Kit. Remove and discard the old Ram Nut. Apply grease to all surfaces and threads of the new Ram Nut and install in the Ram Foot as shown.
White Lithium grease with PTFE additive is used at the factory, but any general purpose bearing grease will work.
The Ram Nut can only be installed/removed on the "Long (Maxi) Side" of the Ram Foot. There is an enlarged opening on that side that is just big enough to get the Ram Nut through. The Ram Nut does not have a front or back side.
This is a good time to apply new, fresh grease to the Ram Foot Cavity as well. No more than 0.60 oz (17.6 ml, 3.5 tsp) of grease should be used to refill the Cavity. This will correspond to roughly 24% of the cavity volume being filled with grease. If too much grease is used, excess will squeeze out with the next use, and potentially impair tool function.
STEP 4 - Install the new Ram Screw
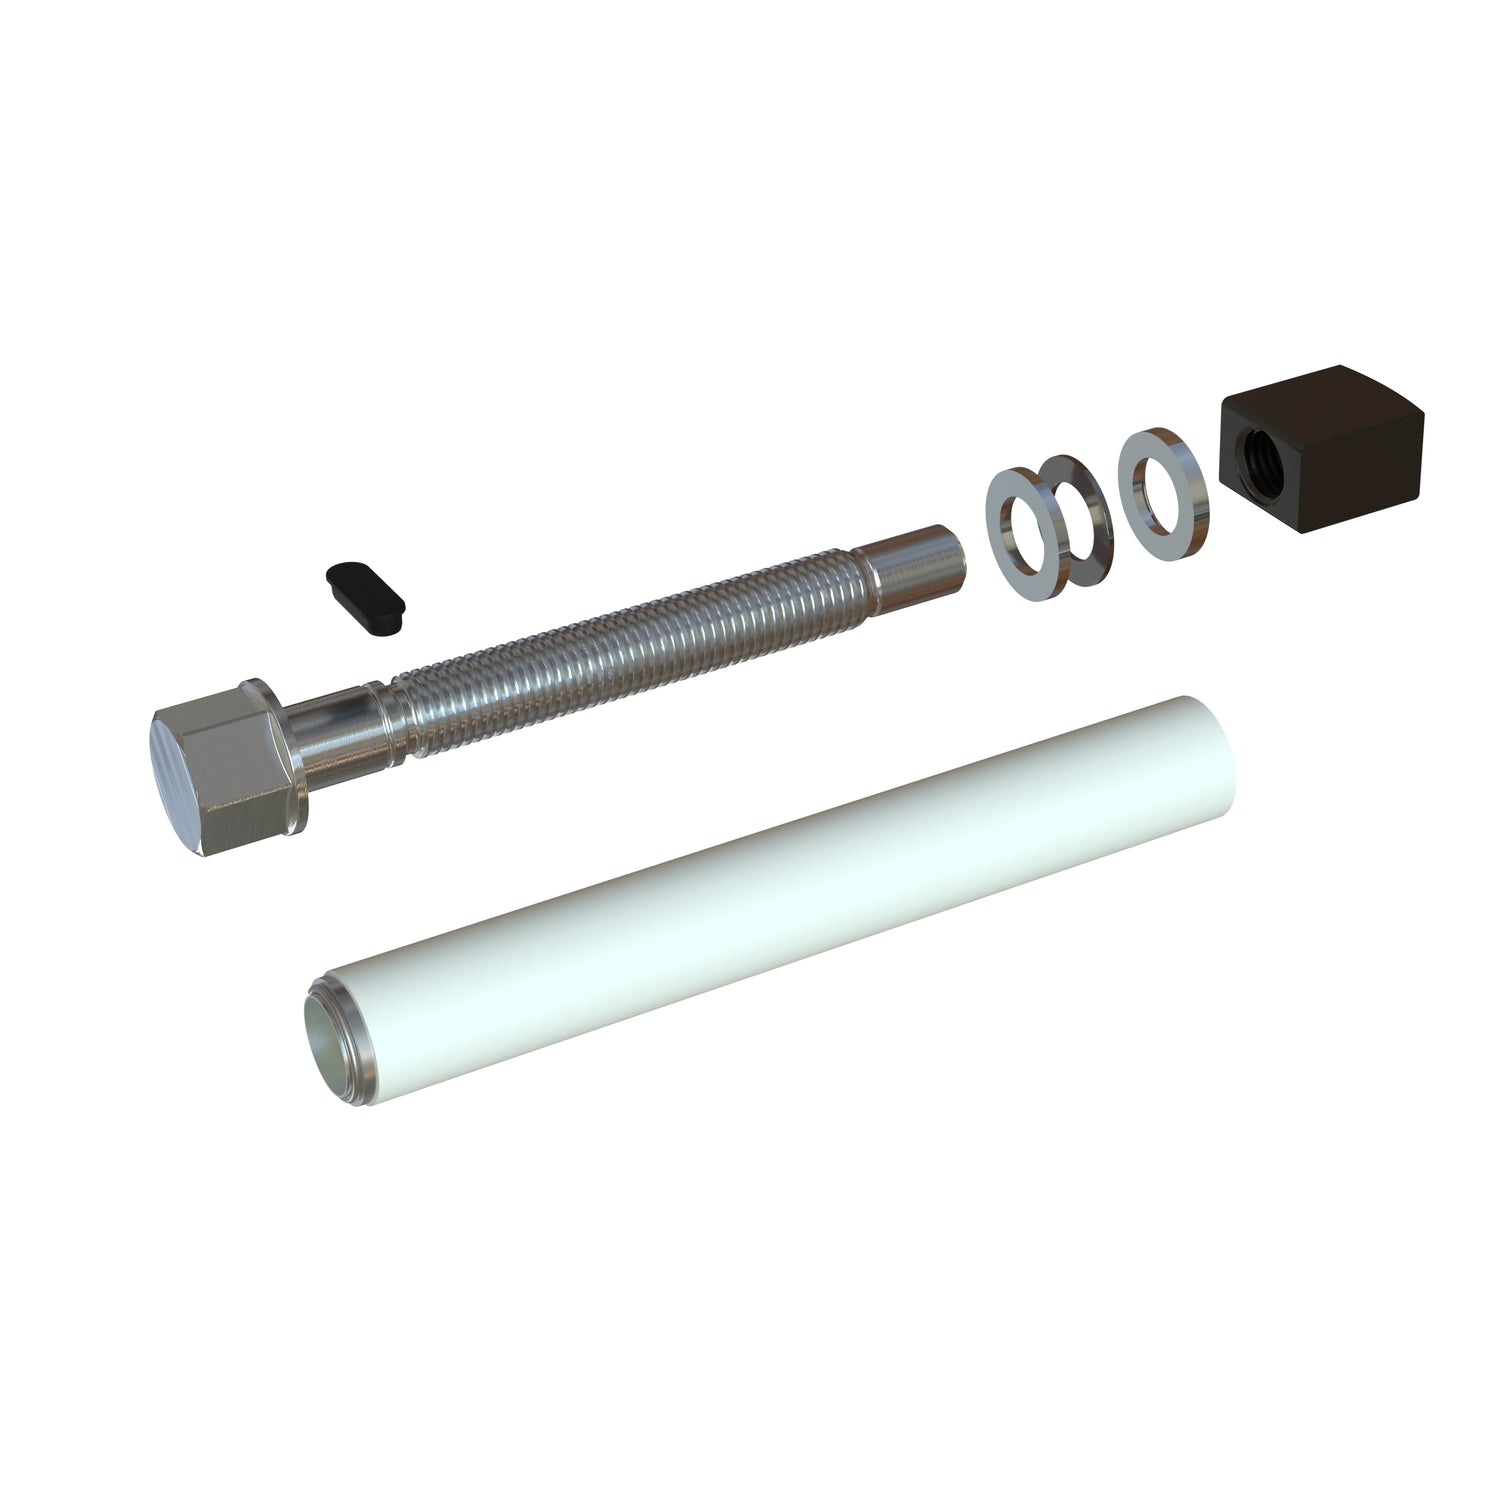
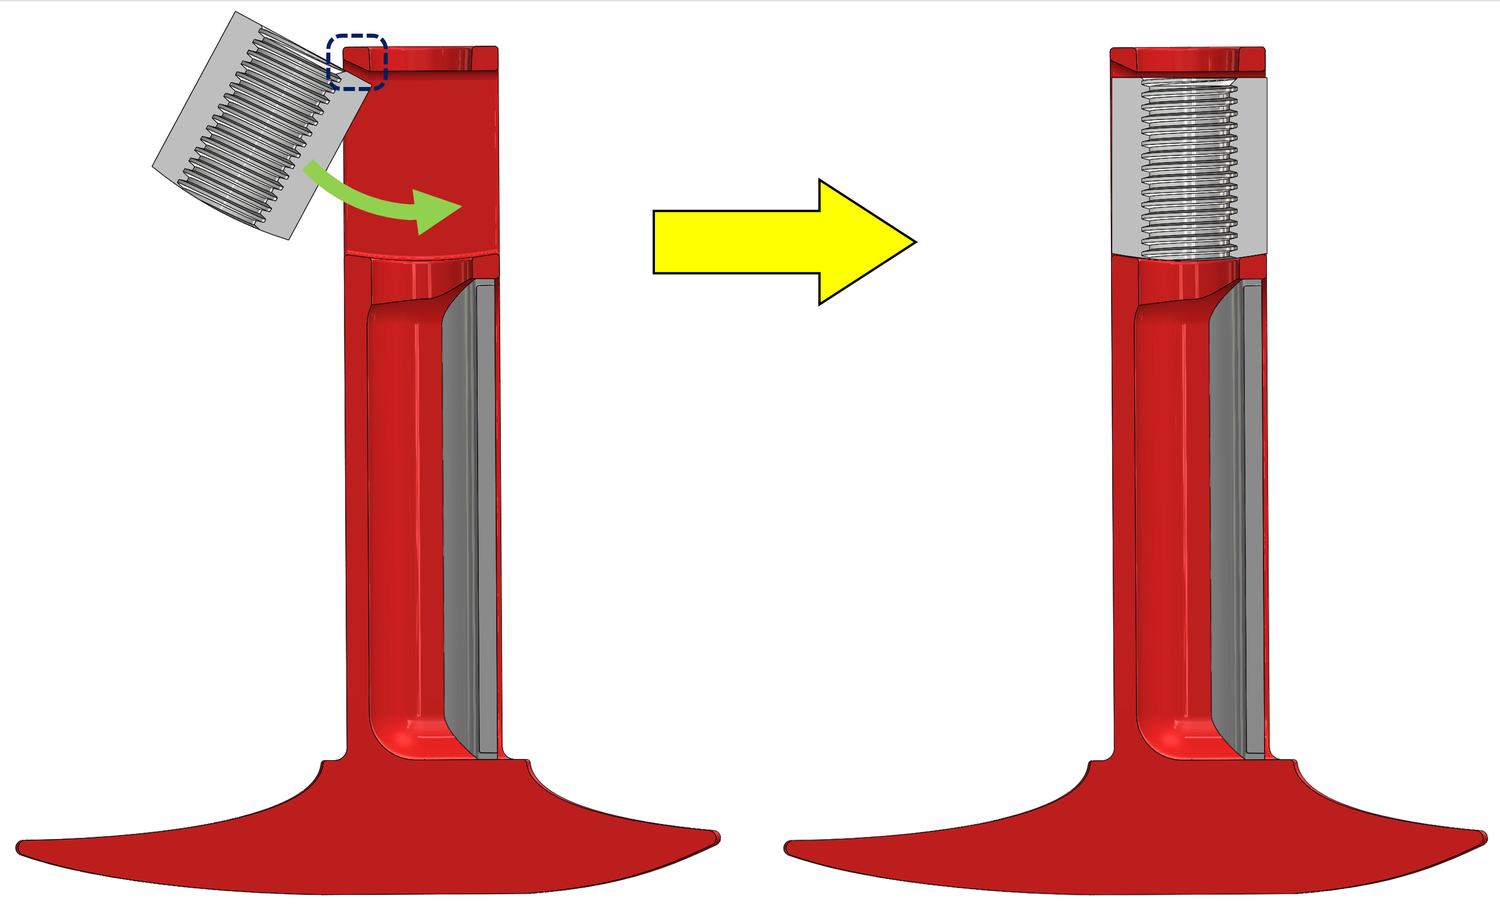
Insert the Ram Screw into the Tool Body (DO NOT pre-grease), and install the Thrust Washer/Bearing Stack as shown. The thicker Thrust Washer Ring Retainer must have the special profile edge facing down towards the tip of the Ram Screw.
DO NOT add oil or grease to the Thrust Bearing Stack. The Oilite bearing has been oiled and prepped from the factory.
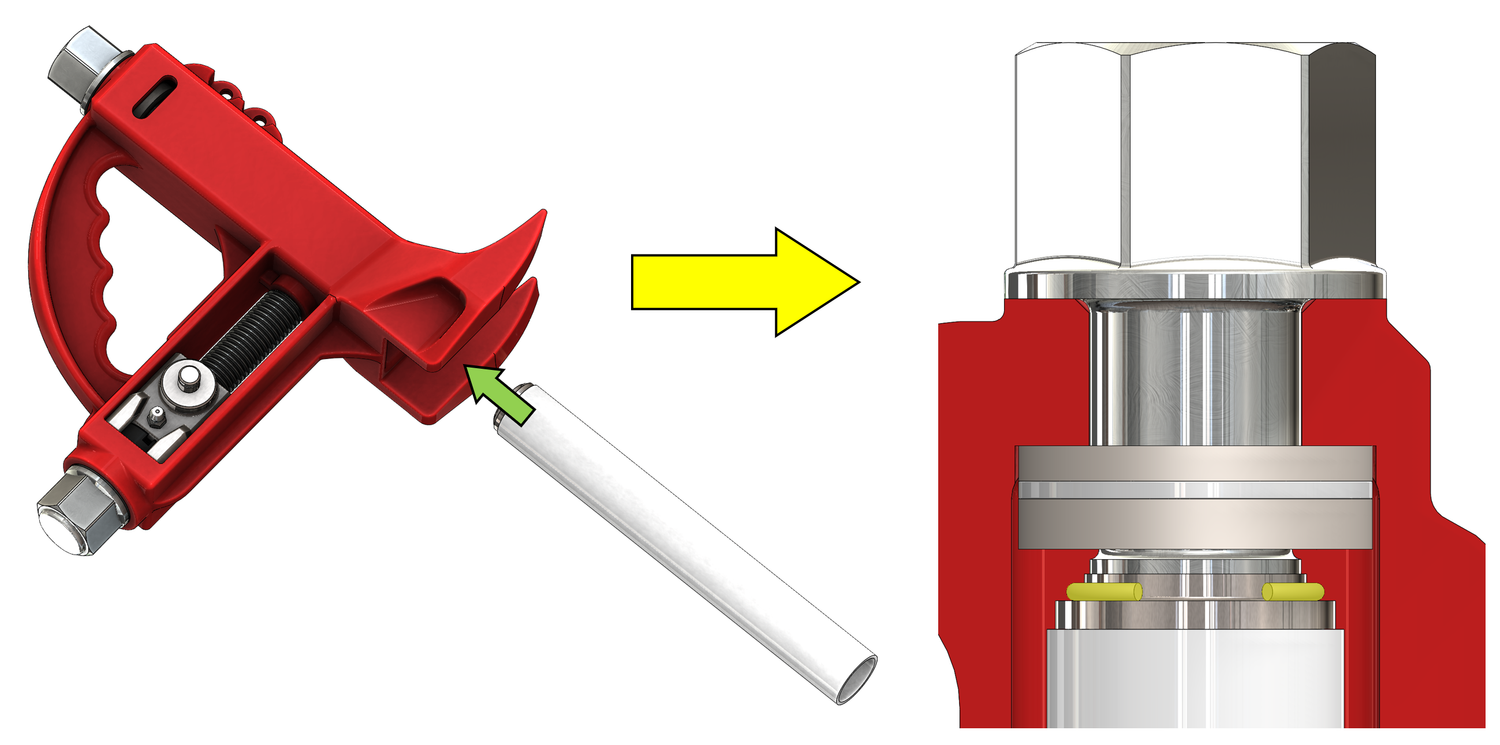
STEP 4 - Insert the Hog Ring Loading Tube
The Hog Ring is pre-loaded onto a special installation tool that allows you to place it all the way inside of the Tool Body, just under the Thrust Washer Stack.
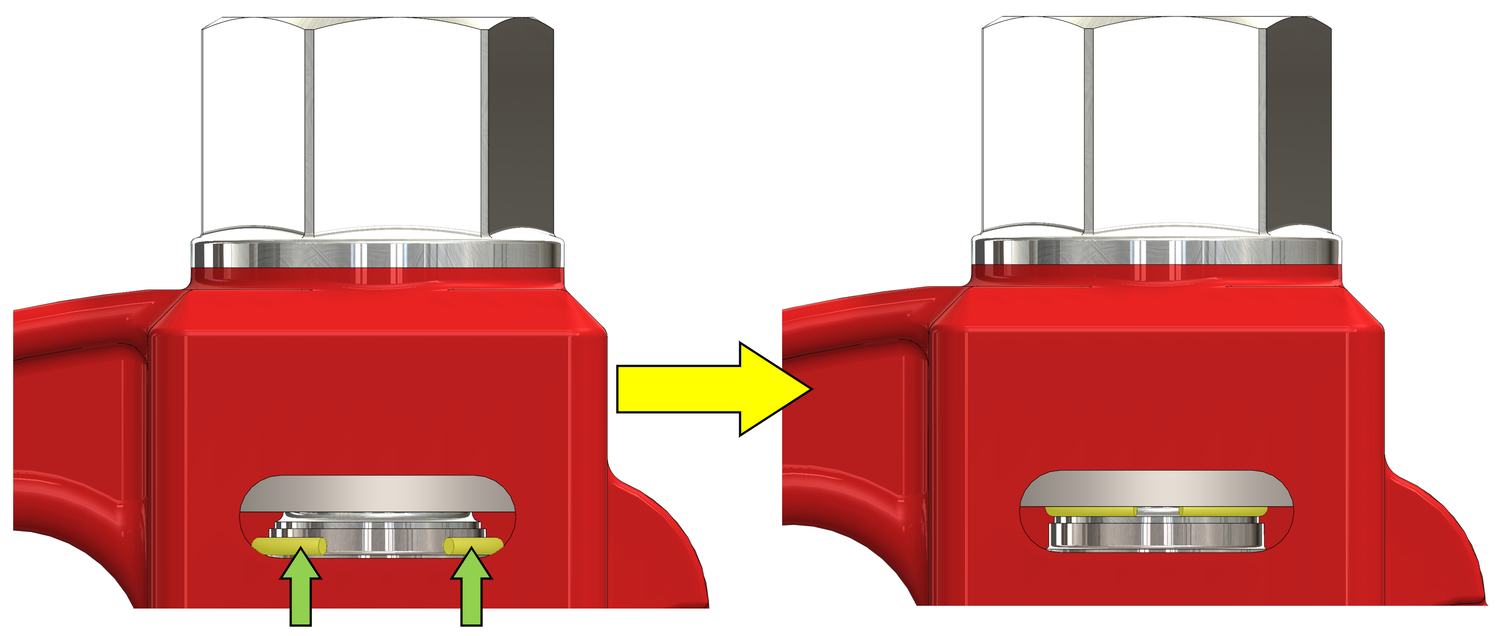
STEP 5 - Push the Hog Ring into the Groove
Keep the Ram Screw Hex firmly seated against the Tool Body, and use a pick or small flat head screw driver to push the Hog Ring off of the Installation Tool and onto the Ram Screw Shaft, just under the groove. You can rotate the Installation Tube to reveal other areas of the Hog Ring to ease it off of the Tube End. Once free of the Tube End, firmly push the Hog Ring with the Installation Tool to seat it into the groove.
STEP 6 - Reinstall all Parts of the XB-650i
Insert the new Body Window Plug, and re-install the:
- Ram Foot
- Clamp Arm
- Clamp Straps
Run the Ram Foot in and out 2-3 times, removing it completely each time and adding more grease to the internal threads of the Ram Nut. This will ensure that the Ram Screw becomes well-greased.