
XB-650i Clamp Screw Rebuild Kit Instructions
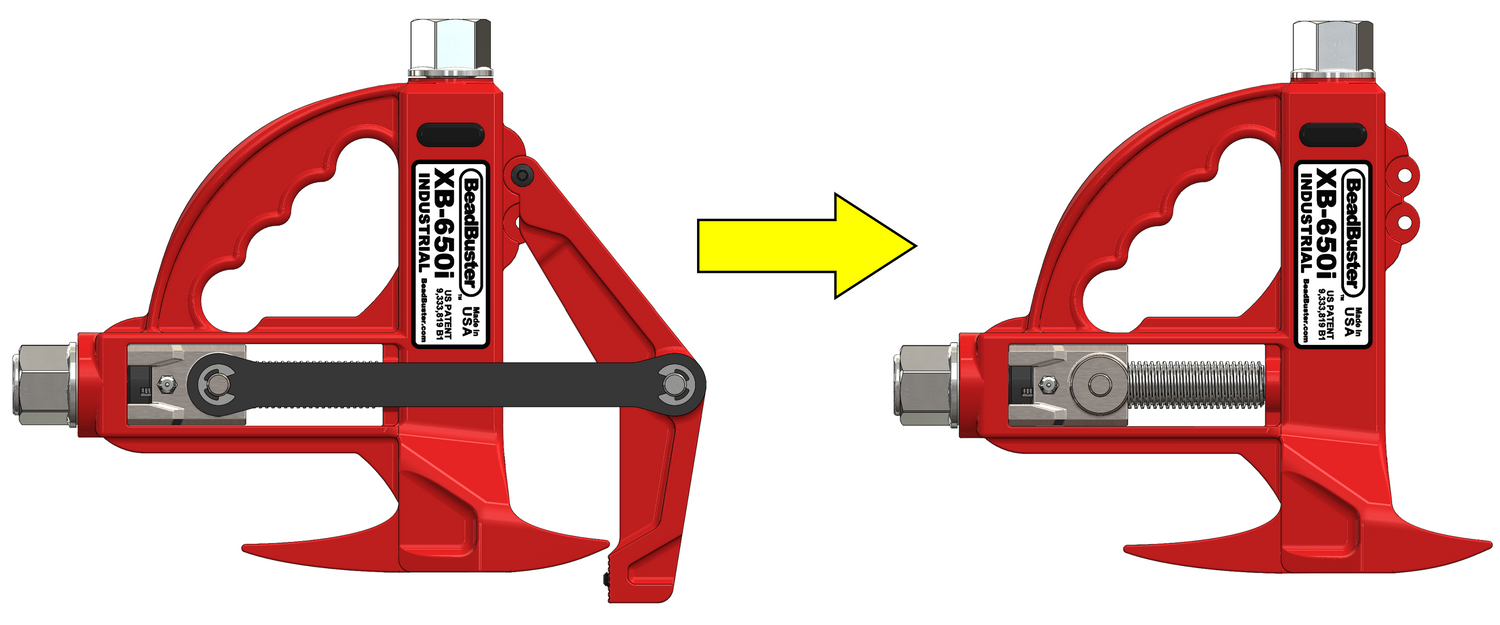
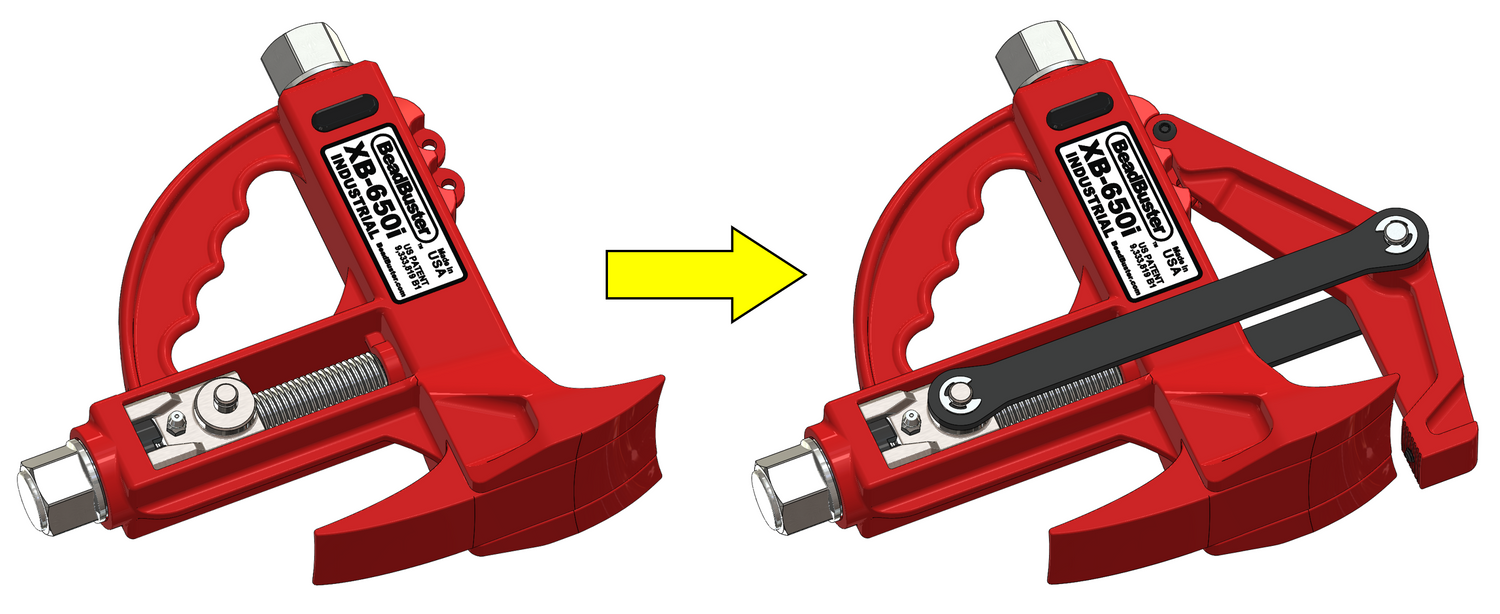
STEP 1 - Strip down Tool
Remove the following parts to make the XB-650i Tool Body easier to work on:
- Clamp Arm
- Clamp Straps

Clamp Screw Retention Parts
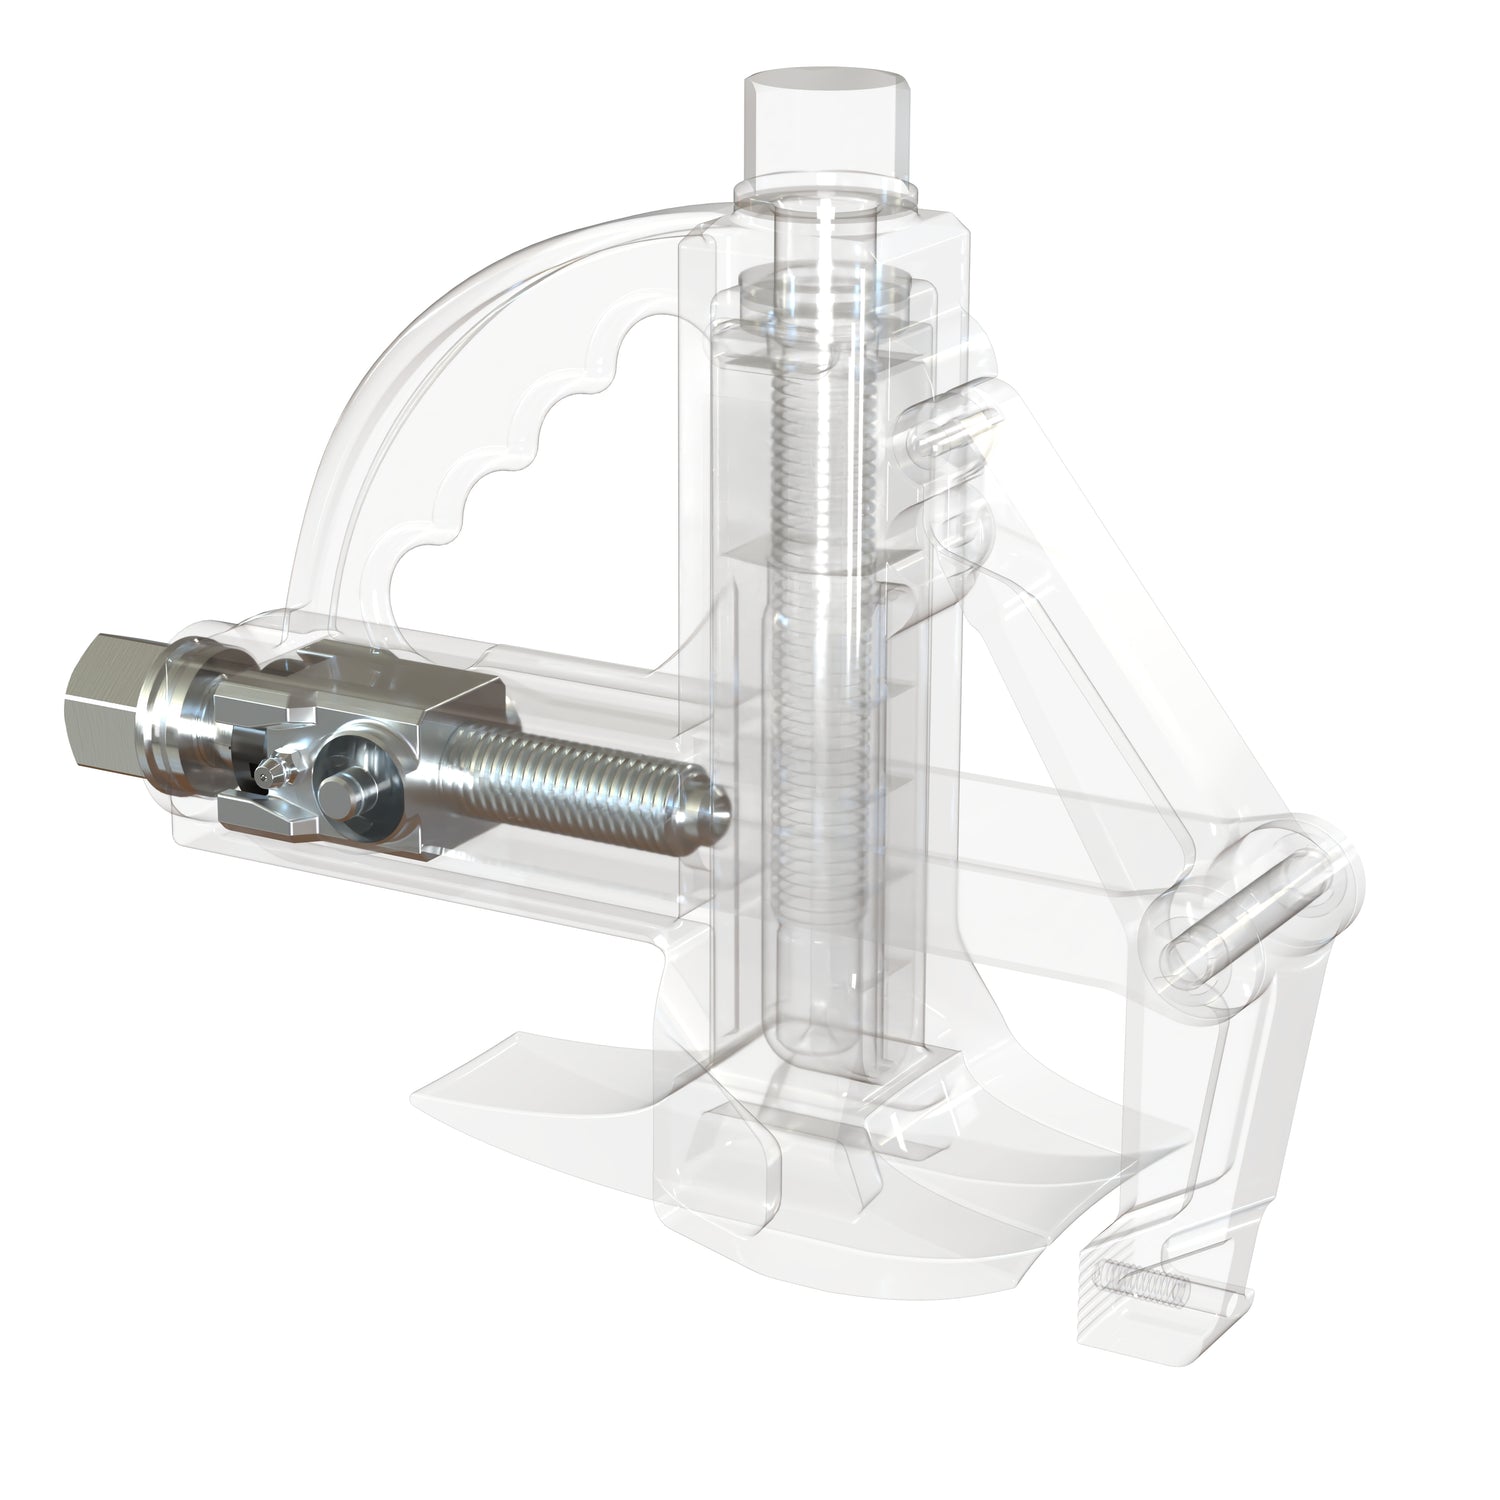
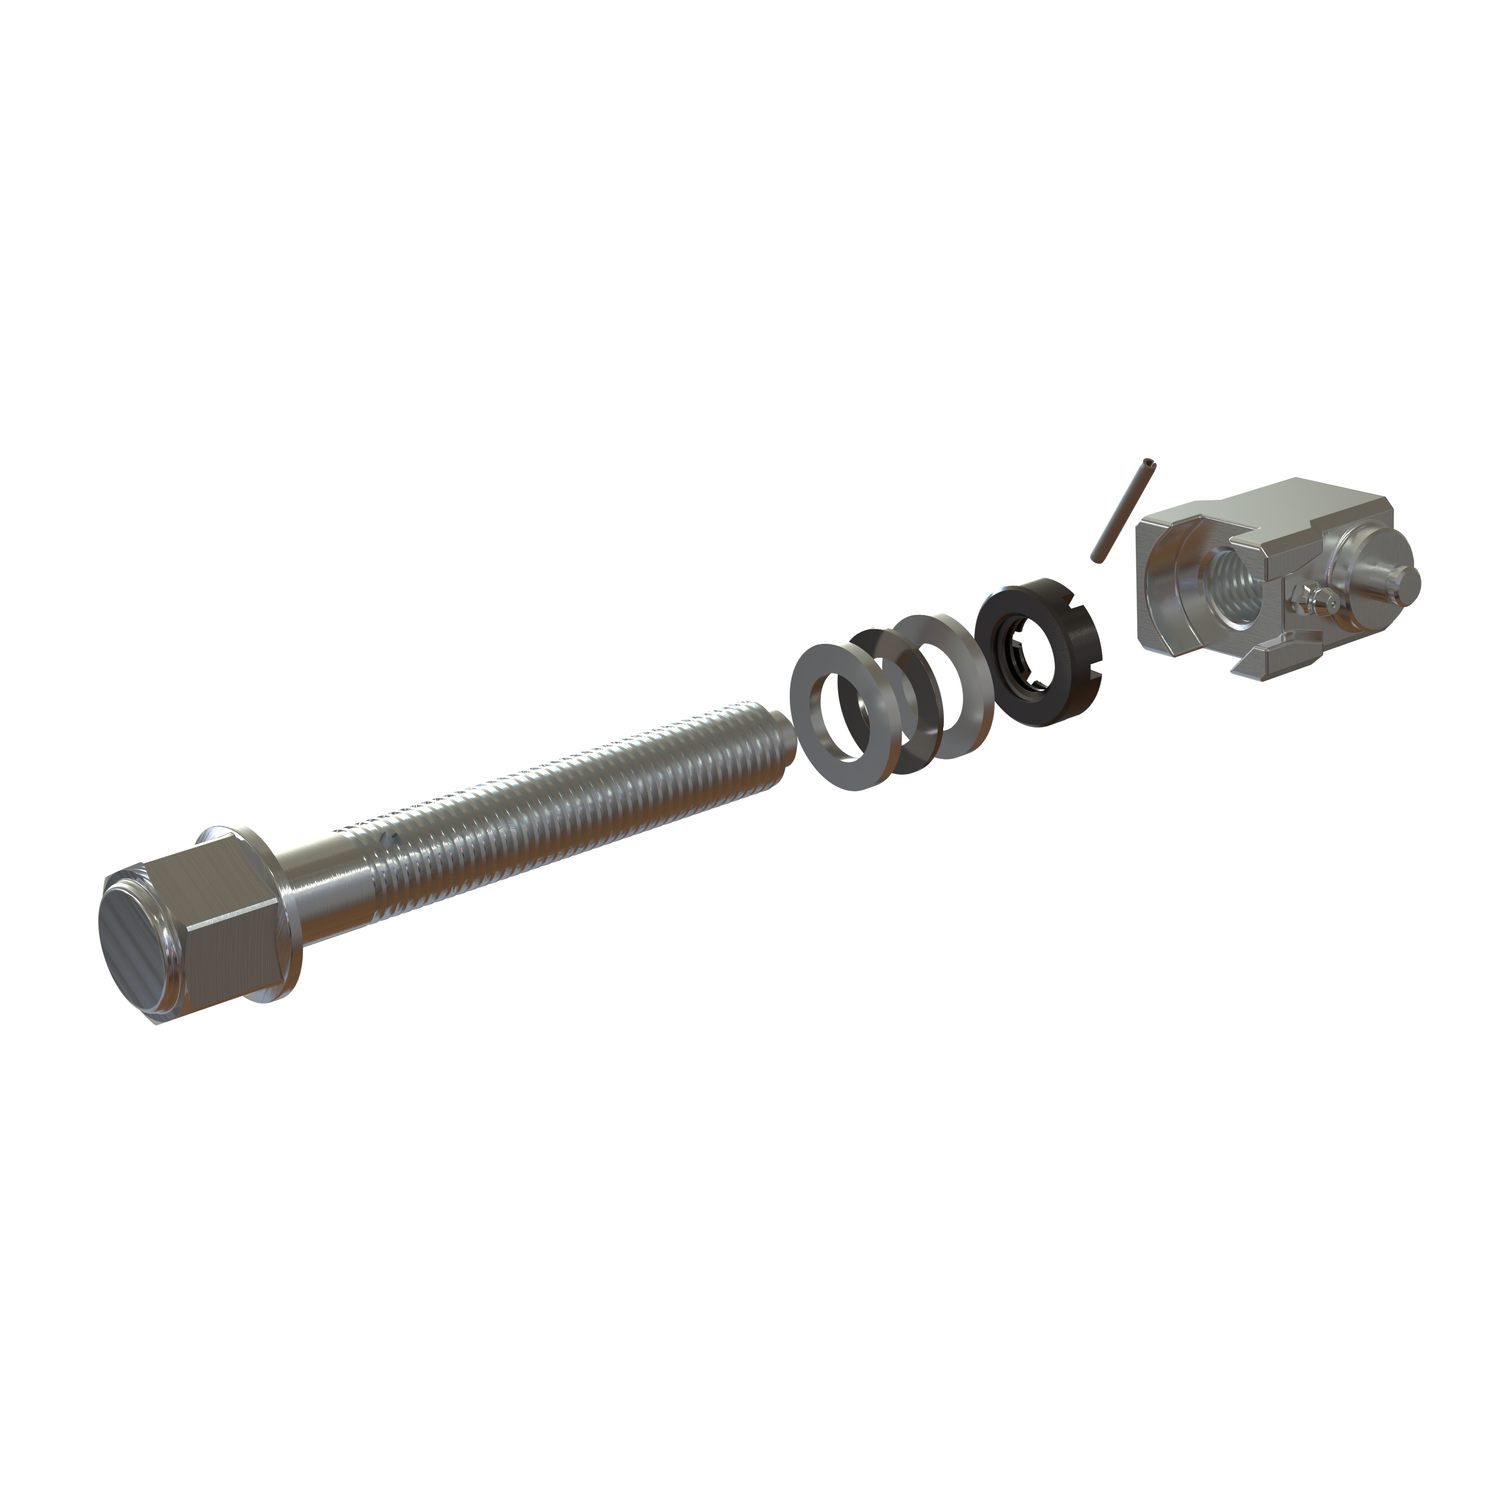
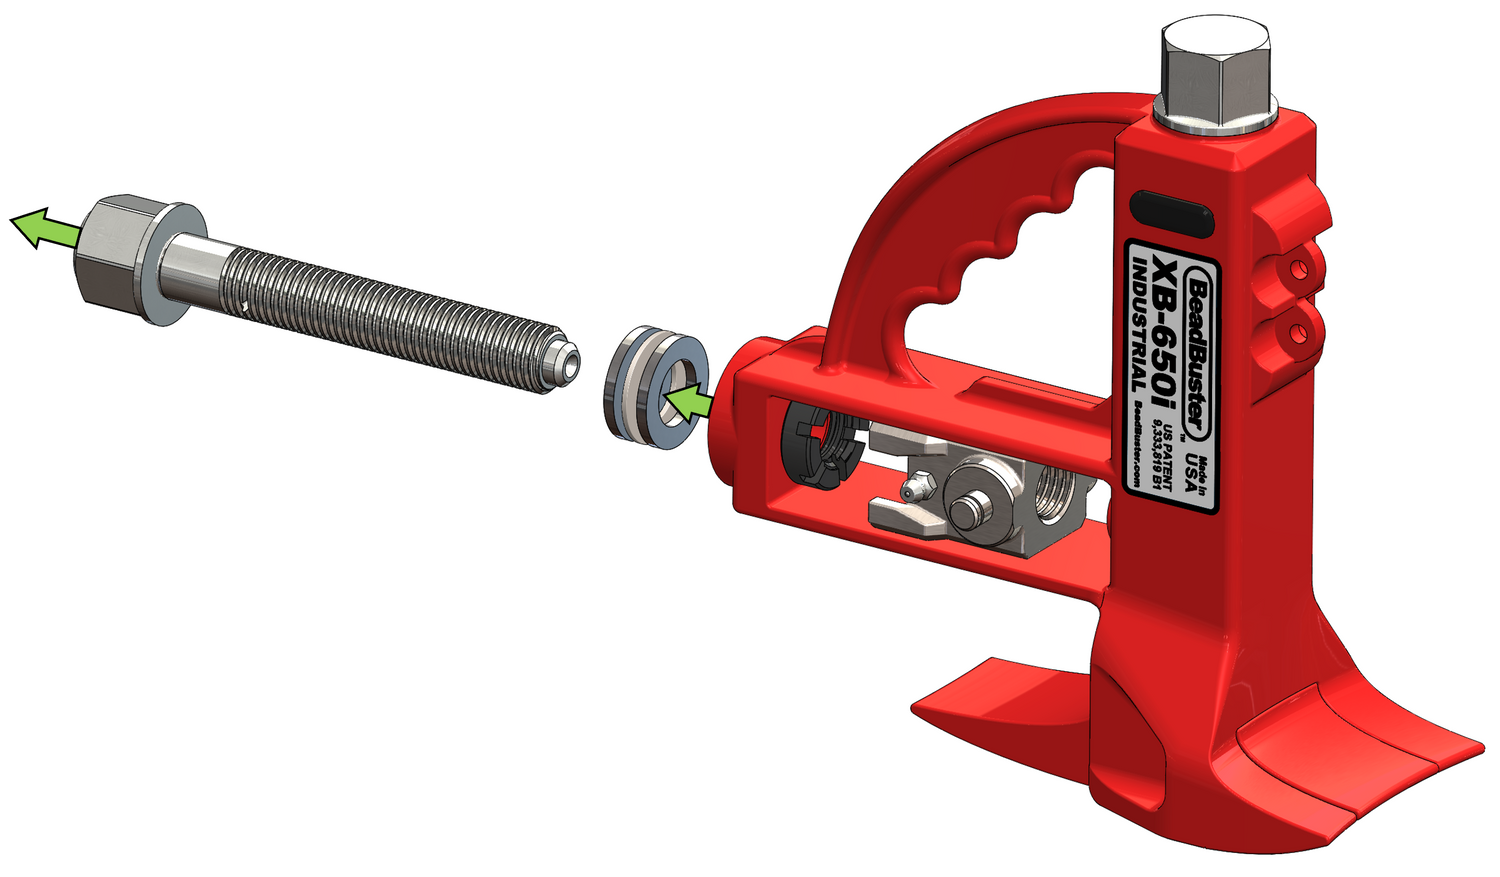
It is important to understand how the Clamp Screw is retained inside the Tool Body. An oil-impregnated (Oilite) Thrust Bearing is sandwiched between 2 Thrust Washers, under the Clamp Screw Hex Head.
On the other side of the Body Frame, a Castle Nut holds the position of the Clamp Screw, and is itself secured with a Roll Pin. This allows the Clamp Carrier to move on the screw threads while the Clamp Screw is turned.
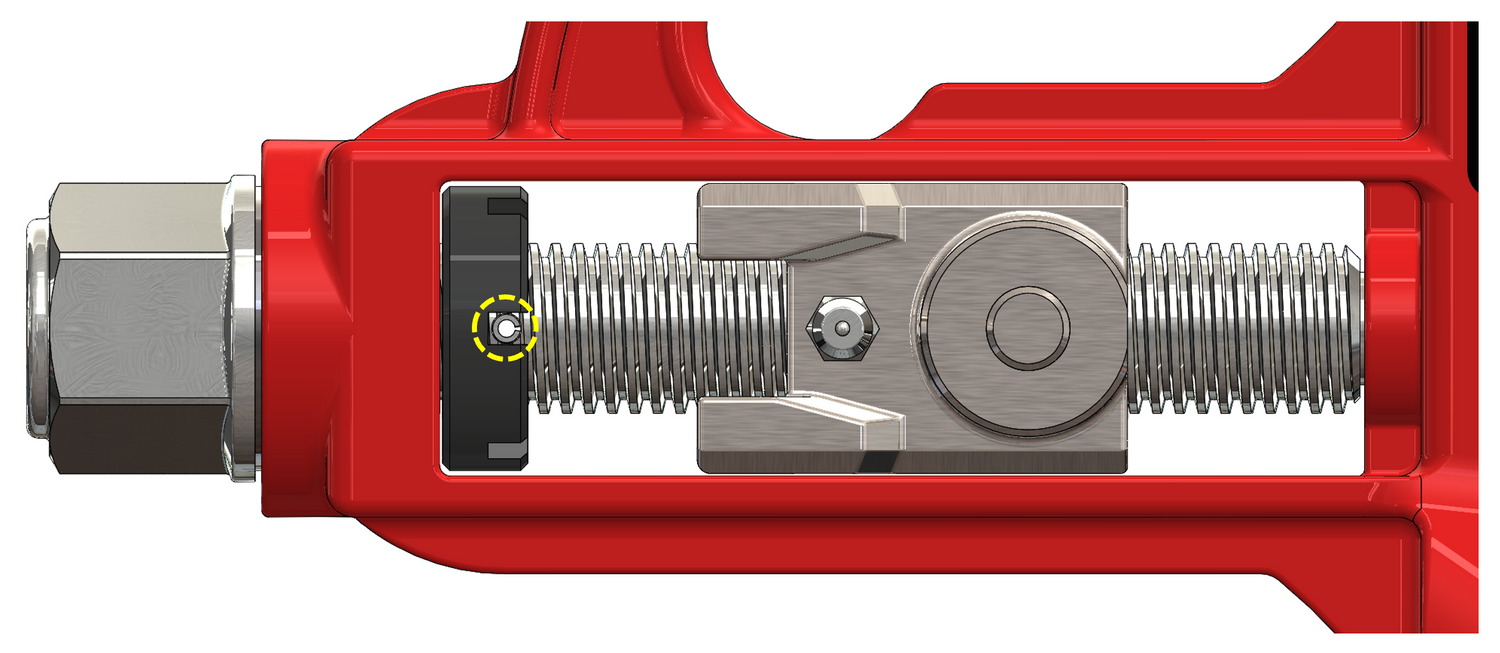
STEP 2 - Position the Castle Nut
Rotate the Clamp Screw Hex until the Clamp Carrier is moved away from the Castle Nut, and the Roll Pin is oriented perpendicular to the side face of the Tool Body.

STEP 3 - Press out the Roll Pin
Use a punch or arbor press to remove the 1/8" dia. Roll Pin. Use a slightly undersized punch, such as 3/32".
STEP 4 - Remove Clamp Screw Parts
Remove the Clamp Screw from the Clamp Carrier and Castle Nut. The Castle Nut is originally installed with Red Loctite, and it will be well secured. Use a screw driver or other implement to wedge in one of the castellations, and brace against the Tool Frame. Use an impact wrench to break the Castle Nut free.
Remove the Thrust Bearing Stack. Discard all Clamp Screw components as they will be replaced with the Rebuild Kit.
Clean the entire internal Carrier Frame surfaces of old grease, as well as the Thrust Bearing pocket and ID of the through-hole, so that the new Clamp Screw is not contaminated with grease when it is installed.
STEP 5 - Install New Clamp Screw Parts
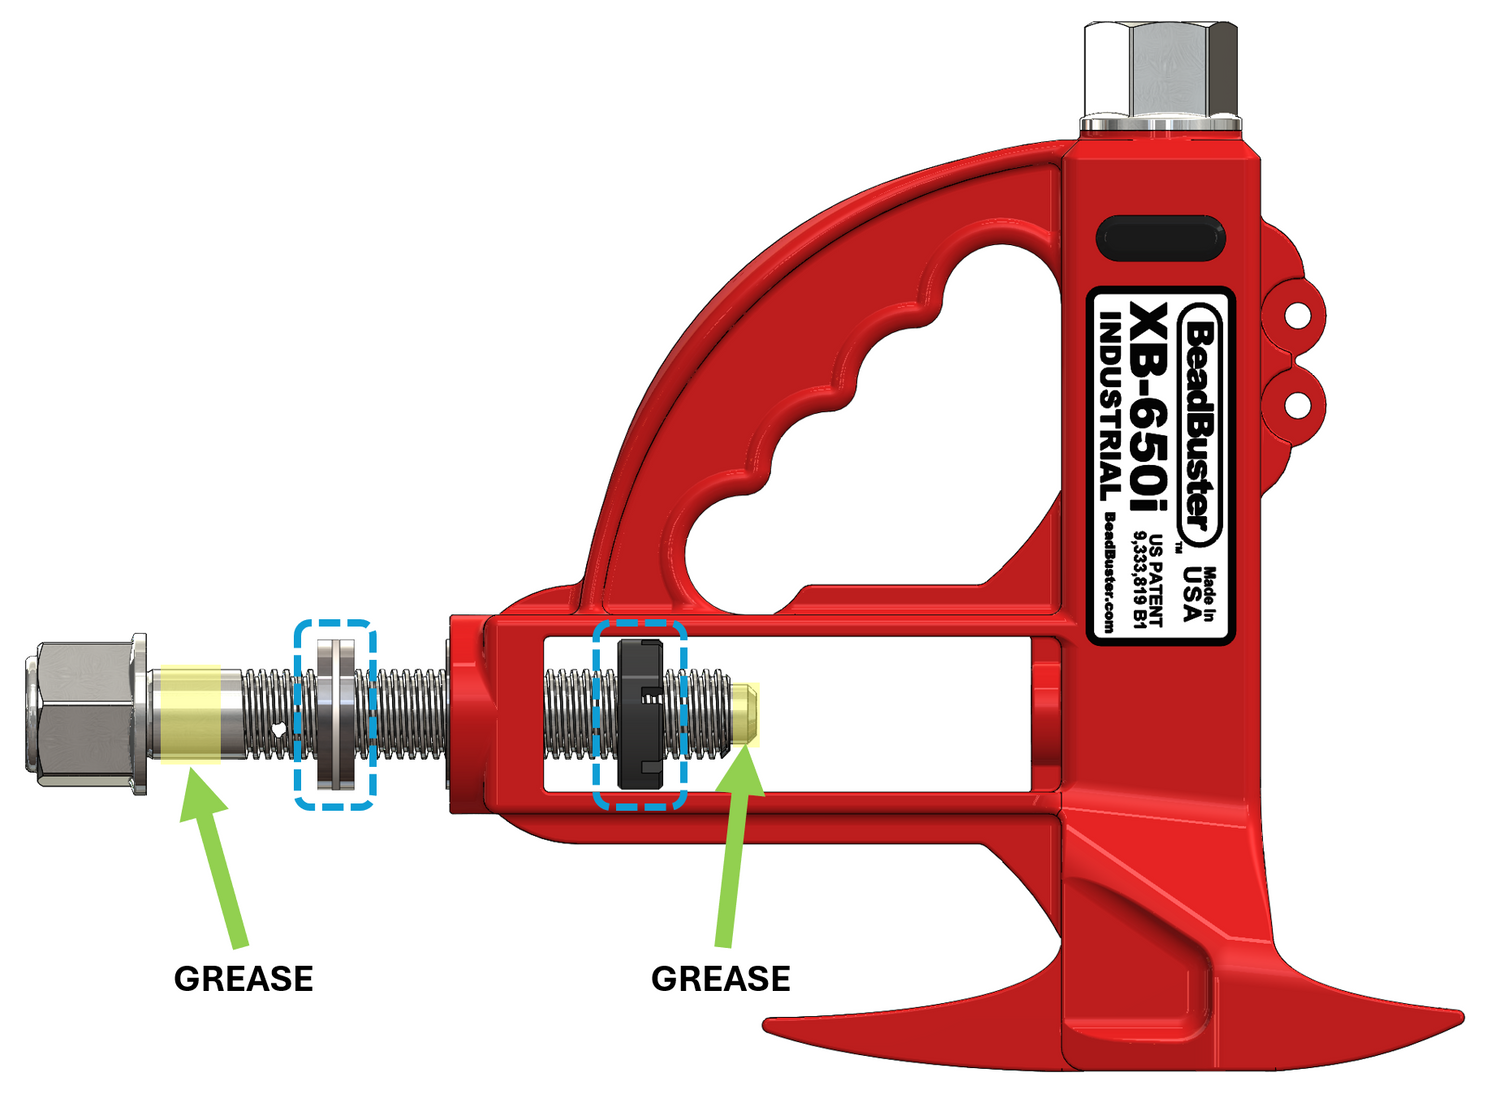
Apply a thin layer of grease to the section of unthreaded Clamp Screw shaft as shown. White Lithium grease with PTFE additive is used at the factory, but any general purpose bearing grease will work. DO NOT apply grease to any other parts at this time.
Install the Thrust Bearing Stack, the 2 Thrust Washers are identical. DO NOT add oil or grease to the Thrust Bearing Stack. The Oilite bearing has been oiled and prepped from the factory. Thread the Castle Nut onto the Clamp Screw with the castellations facing the Tool Body.
Once the Castle Nut is threaded on, apply grease to the tip of the Clamp Screw. TAKE CARE to not get any grease on the Castle Nut threads.
STEP 6 - Install New Clamp Carrier
Install and thread the Clamp Carrier onto the Clamp Screw as shown (Clamp Strap pins towards the Tool Body, and Grease Fitting on the label-side of the Tool).
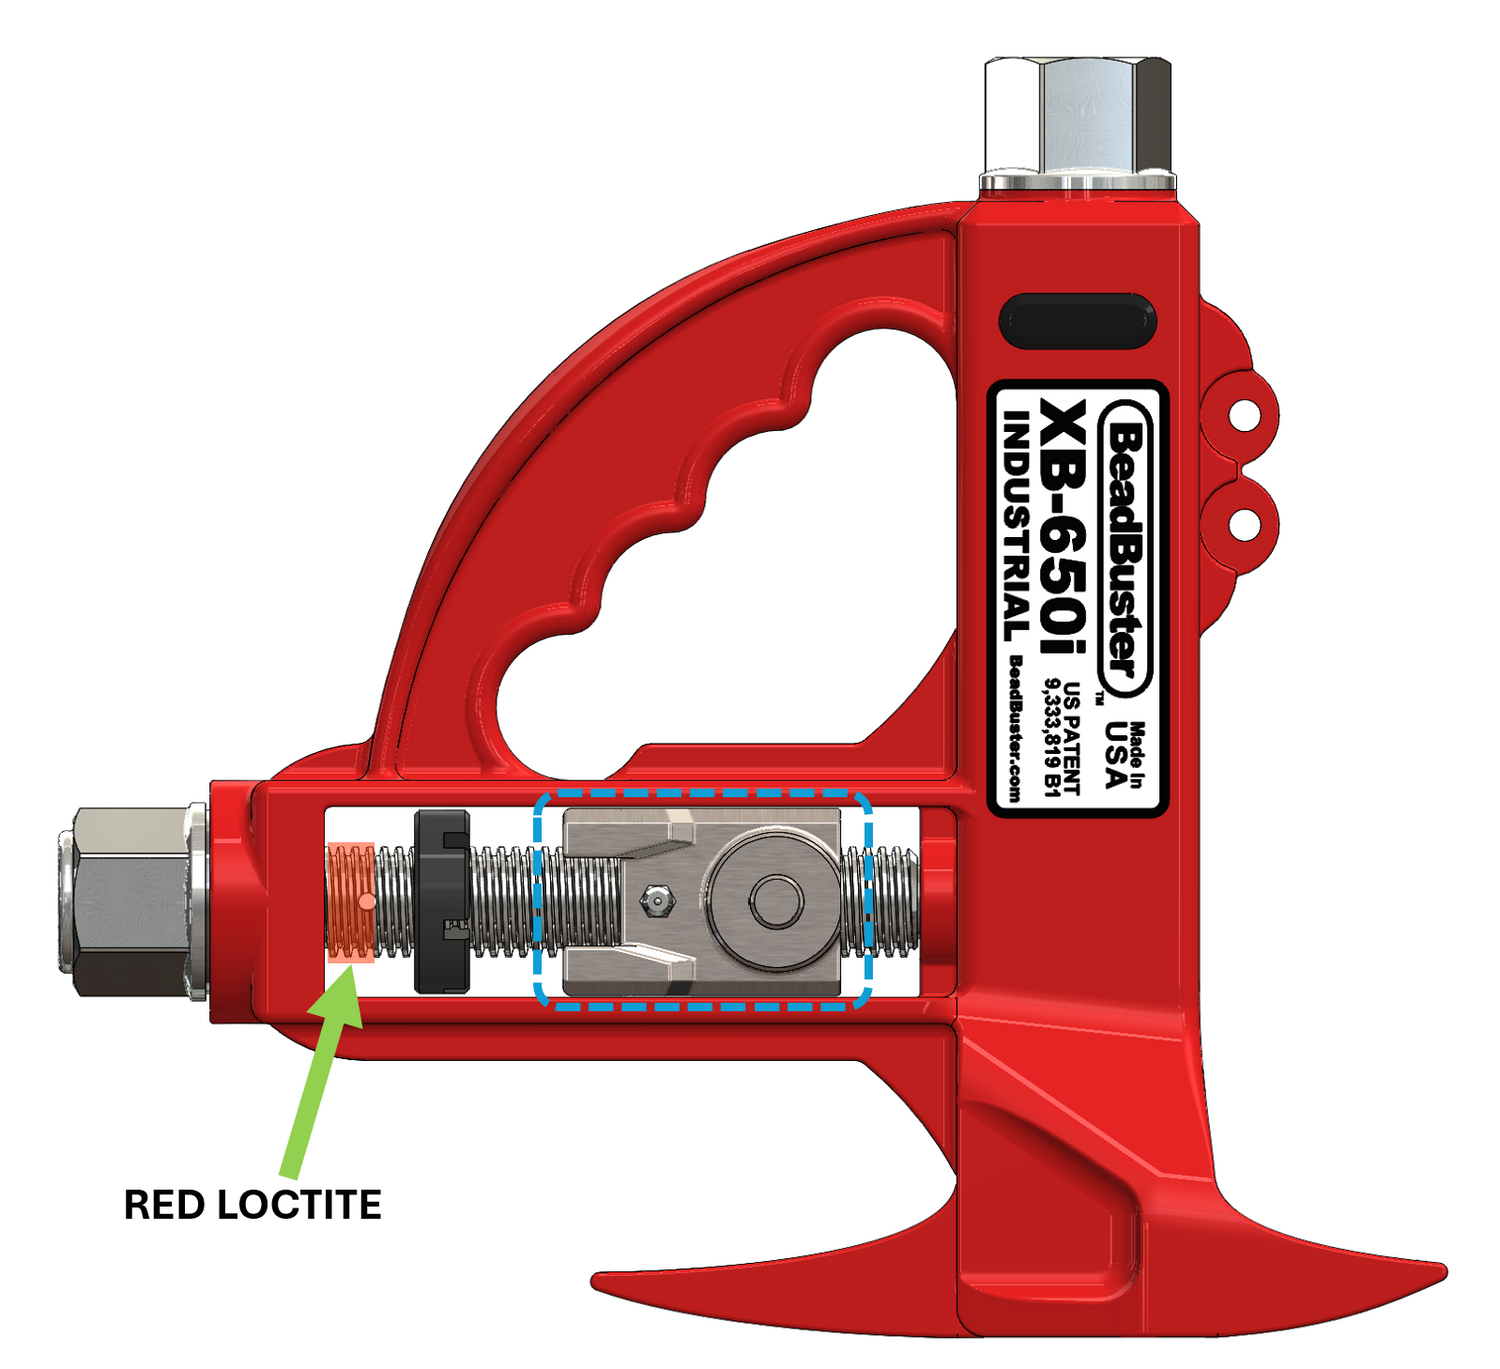
With the Clamp Screw Hex Head firmly seated against the Thrust Bearing Stack, apply Red Loctite to the area of the screw threads as shown.
Advance the Castle Nut back until it is in contact with the Tool Body, and there is no free axial play with the Clamp Screw.
STEP 7 - Position the Castle Nut
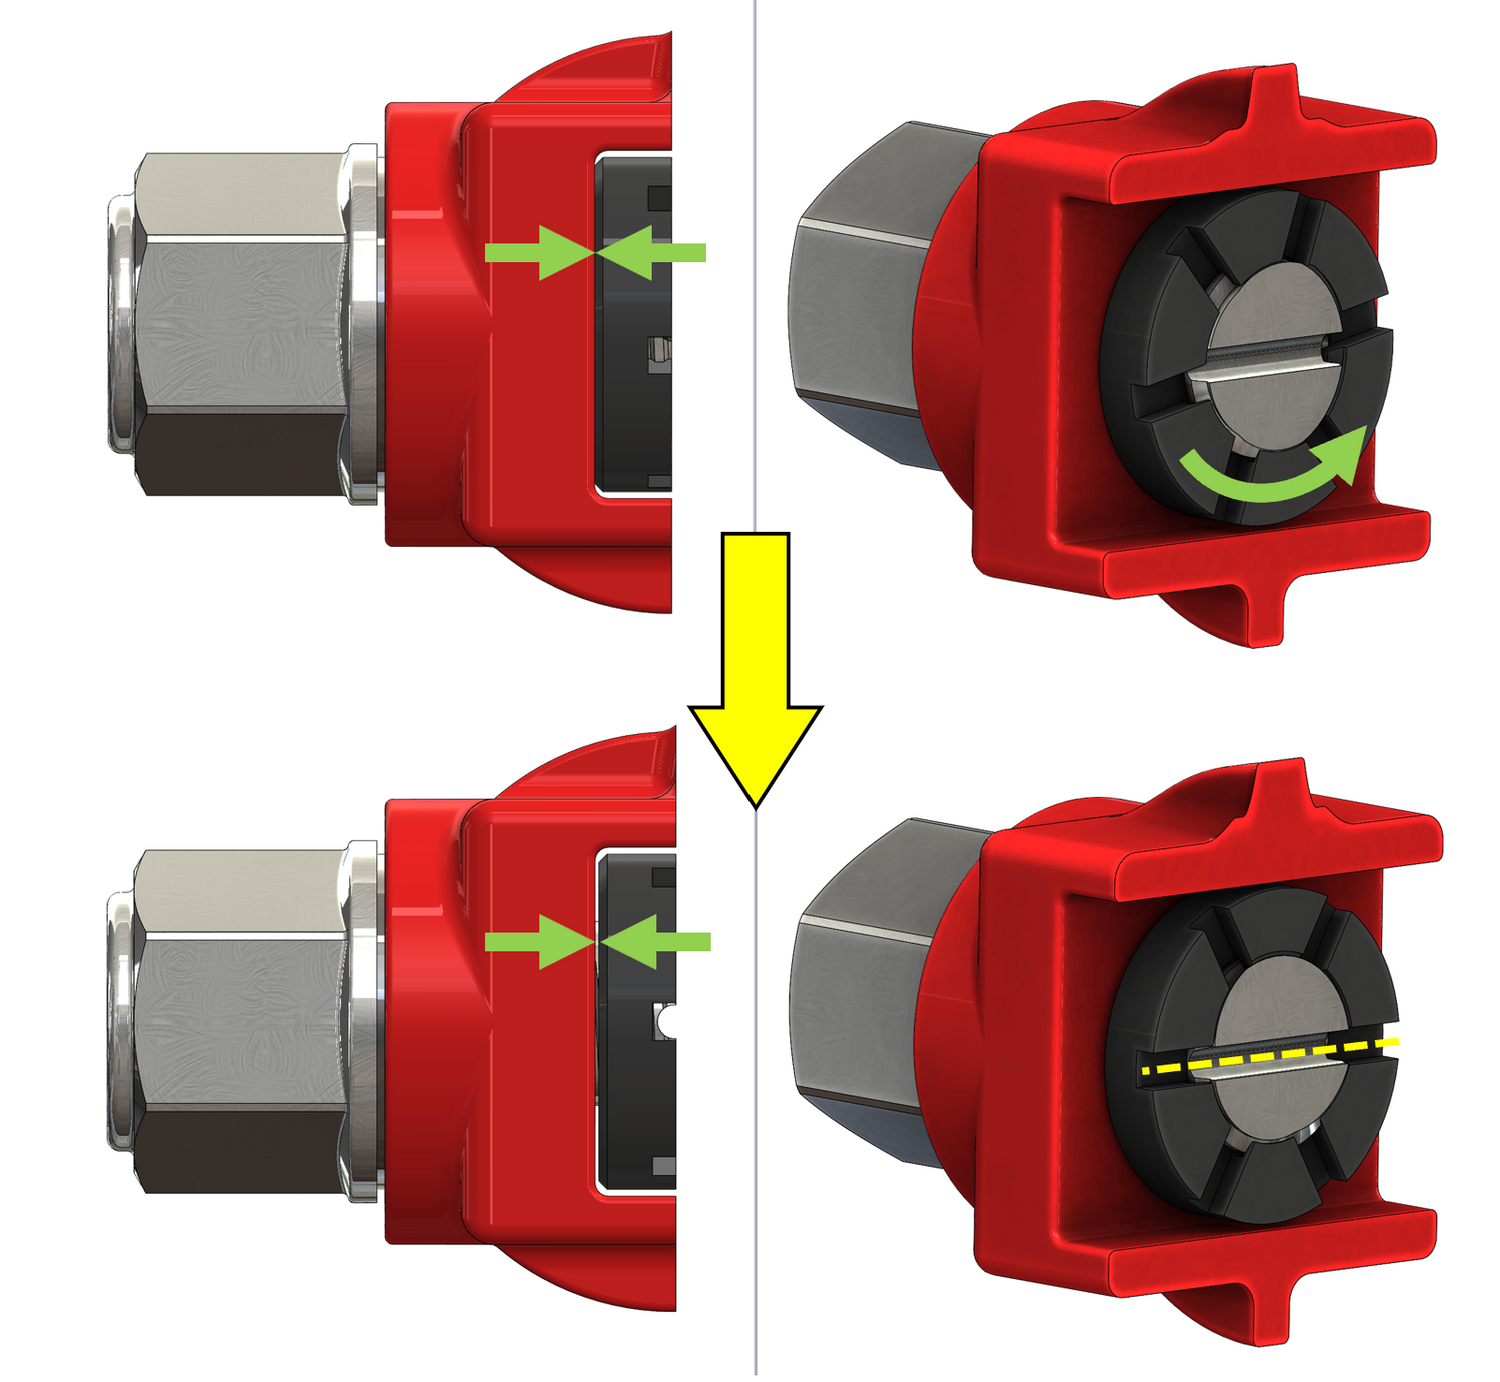
Work quickly before the Loctite sets (approx. 10 minutes). Loosen the Castle Nut until the 1st castellation lines up with the hole in the Clamp Screw. This should provide for a maximum gap between the Tool Body and Castle nut of 0.017".
Rotate the Clamp Screw until the through-hole is oriented perpendicular to the side face of the Tool Body.
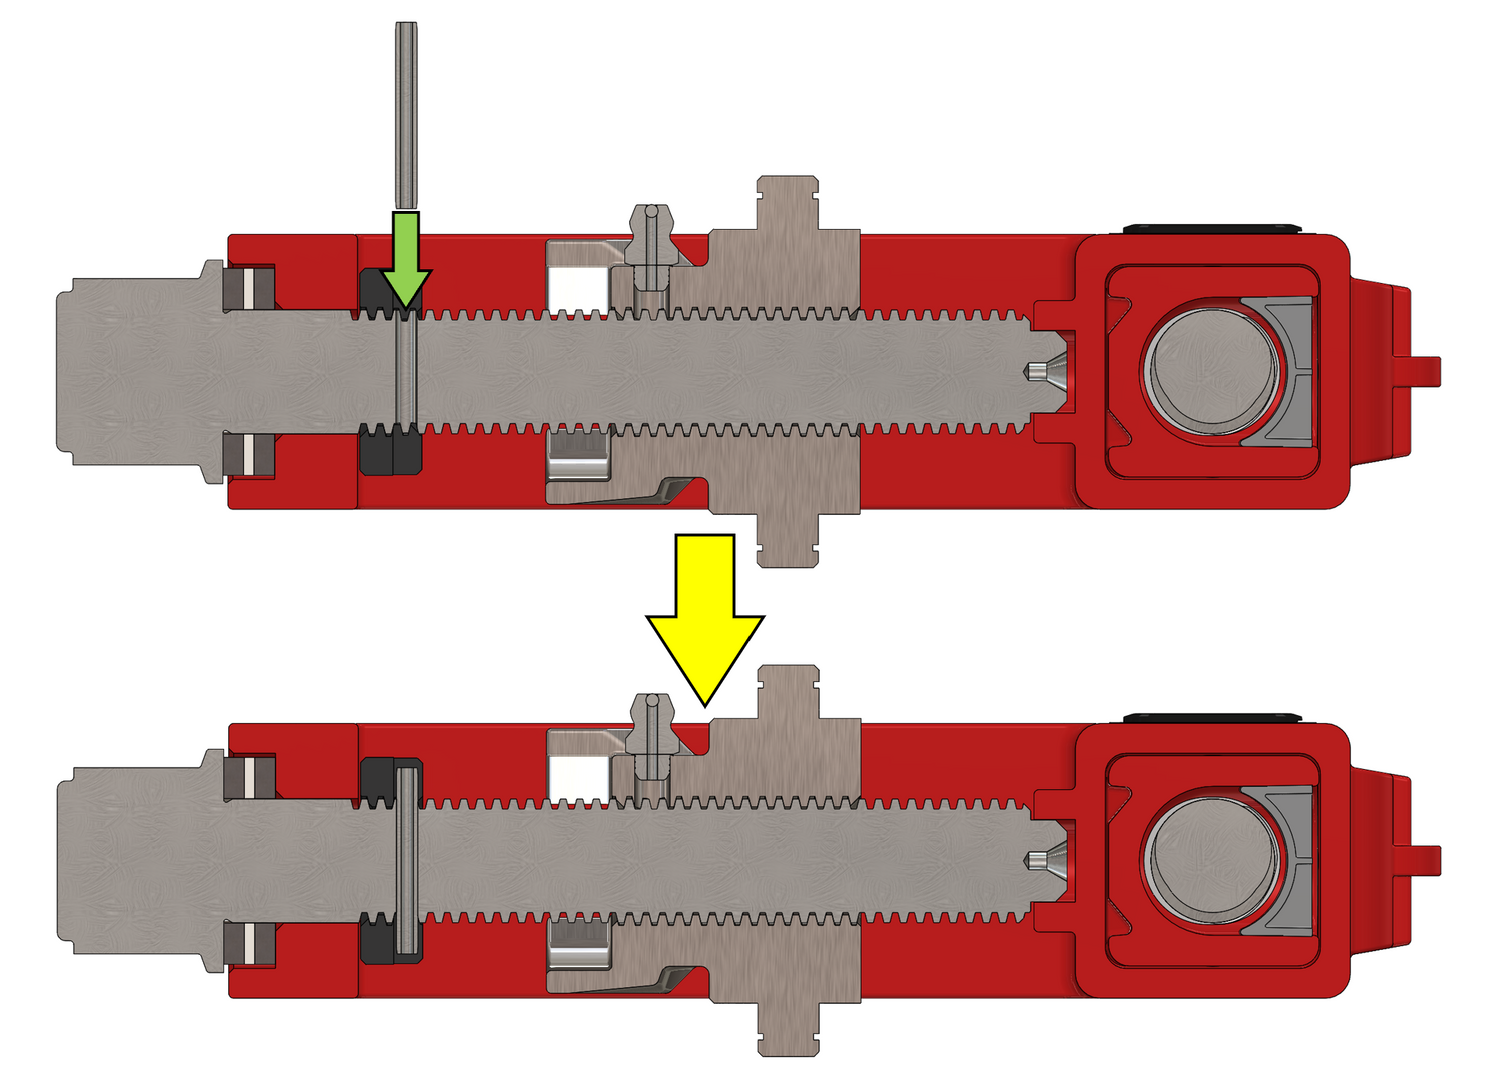
STEP 8 - Insert the Roll Pin
Use a punch or arbor press to drive in the Roll Pin. The edges of the pin must be below flush of the outside diameter of the Castle Nut.
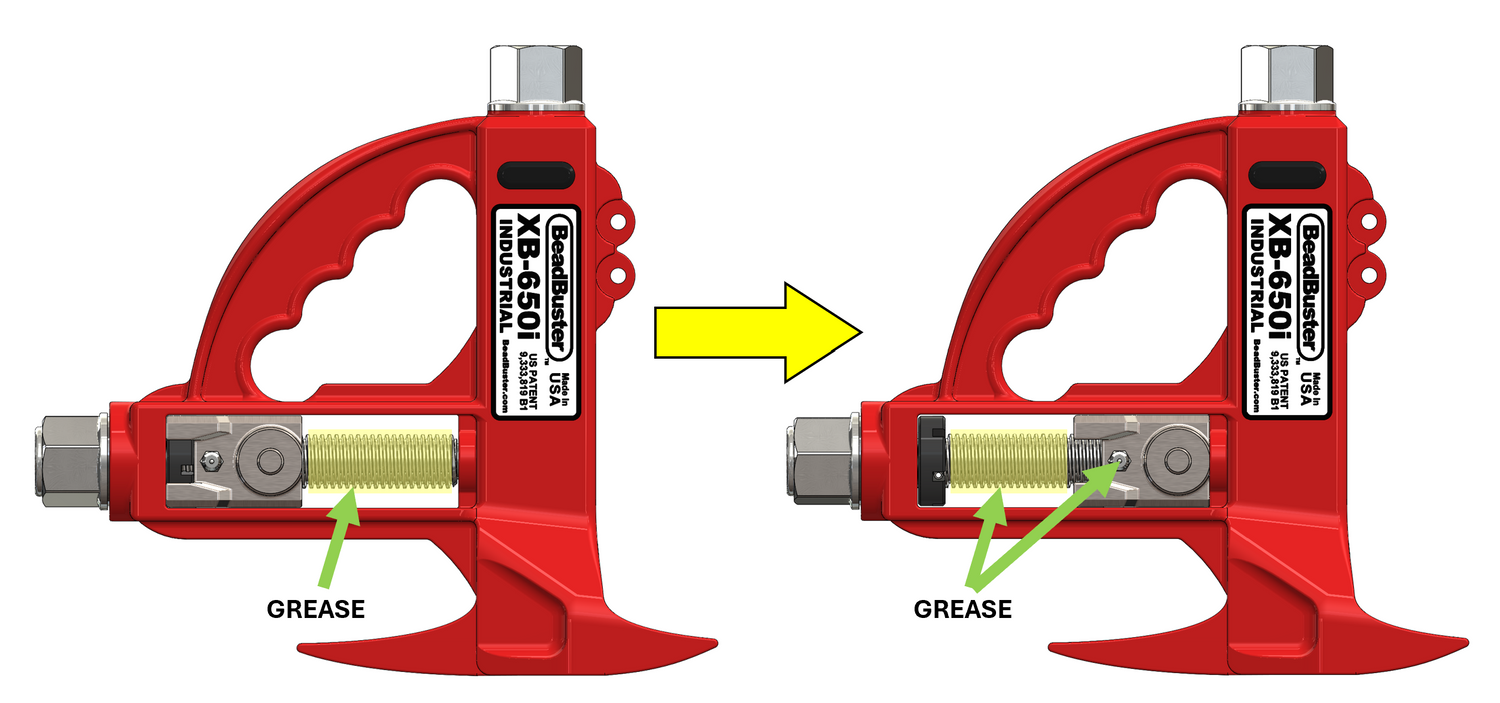
STEP 9 - Grease the Clamp Screw Thread
Now that the Castle Nut is fully installed, grease can be applied to the screw threads. Move the Clamp Carrier to one side of the frame, apply grease to the exposed threads, and move the Carrier to the opposite side, and repeat.
Apply grease at the Grease Fitting on the Carrier. Run the Carrier up and down the Screw 1-2 times to distribute the grease along the threads.
STEP 10 - Reinstall all Parts of the XB-650i
Re-install the:
- Clamp Arm
- Clamp Straps
Allow the Loctite to fully cure for 24 hrs before using the Tool, or applying impact torque the Clamp Screw.